Delem DA-53T is a common cnc press brake controller used to control the operation of the cnc press brake. Today, we are going to use the DELEM DA-53T controller to bend an arc, you can follow the steps below to perform simple operations:
Preparation
According to the method introduced in the previous article, make sure that your hydraulic press brake has carried out effective parameter setting and mold installation. After these tasks are completed, we can turn on the main power supply, controller power supply and oil pump power supply of the press brake in turn, and make them in working condition.
Create program
Use the program editing function on the controller to create a new bending program step by step to ensure that the logic of the program is correct. You can refer to the video below:
https://www.youtube.com/watch?v=5EILcihWeEI
If you don't want to watch the video, you can also refer to the following specific steps:
Step 1: On the "Products" page of the DA-53T controller, click the "New Program" button on the right to create a new bending program;
 – IV - Pictures 1")
Step 2: On the pop-up "Product Properties" page, enter the "Product ID", "Product Description", "Thickness" and other parameters in sequence, select and set the material of the plate;
 – IV - Pictures 2")
Step 3: After the "Product Properties" information is set, click the "Accept" button at the bottom right;
 – IV - Pictures 3")
Step 4: At this point, the page will automatically jump to the "Tool Setup" page, where you can choose to set the punch and die you are currently using, and then click the bottom to switch to the "Program" page;
 – IV - Pictures 4")
Step 5: Click on the bottom to switch to the "Program" page;
 – IV - Pictures 5")
Step 6: Click to set the "angle" value for arc bending, and then click the "bumping" button in the lower right corner;
 – IV - Pictures 6")
Step 7: On the bumping setting page that pops up, enable the arc bending function, set the angle, radius, and number of equal parts of the arc bending, and then click the "Accept" button;
 – IV - Pictures 7")
Step 8: The page jumps to the "Program" page, and you can see that the system has automatically added the bending step, but there is a red error prompt, and we need to adjust the X-axis parameters of the first bending;
 – IV - Pictures 8")
Step 9: Scroll up to the top of the page to see the parameters of the first step;
 – IV - Pictures 9")
Step 10: Click on the value and modify it to the correct value;
 – IV - Pictures 10")
Step 11: After the modification is completed, scroll down to check whether there are still errors reported in all working steps;
 – IV - Pictures 11")
Step 12: After checking, you can click to switch to the "Auto" page through the bottom navigation, and then click the start button in the lower right corner to start the bending operation.
 – IV - Pictures 12")
Operating the press brake
After clicking the start button on the controller, the bending operation can be started. The controller will complete the arc bending operation step by step according to the parameters and paths formulated in the program. During operation, ensure that the state of the controller and press brake is stable, and make necessary monitoring and adjustments in time.
https://www.youtube.com/watch?v=5EILcihWeEI
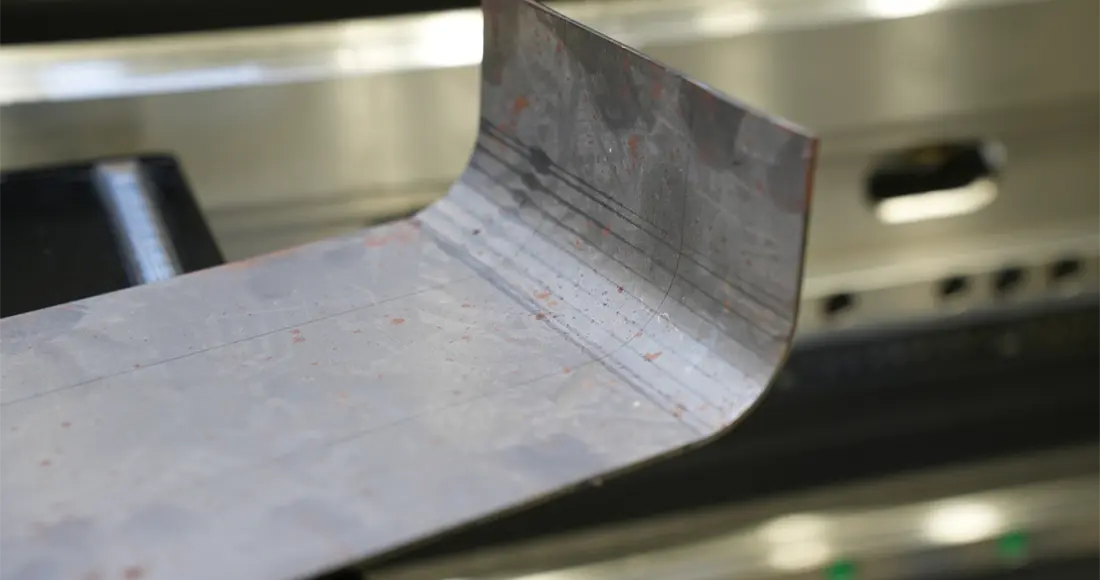
Test result
After the bending operation is complete, check the bend result to make sure it meets the requirements. If further adjustments are required, fine-tuning can be made using the trim function on the controller.
 – IV - Pictures 13")
At the end
Please note that the above steps are only a general guide, and the specific operation process may vary depending on the model of the press brake and the function of the controller. It is recommended that you refer to the user manual of the Delem DA-53T controller or consult our service support for accurate operation instructions.
The above is the specific operation of how to perform a reference point check on the CNC Press Brake, I hope it can help you. If you have completed the above operations, you can continue to read our next article:
DELEM DA53T china press brake installation – I
DELEM DA53T china press brake installation(Tool configuration)- II


