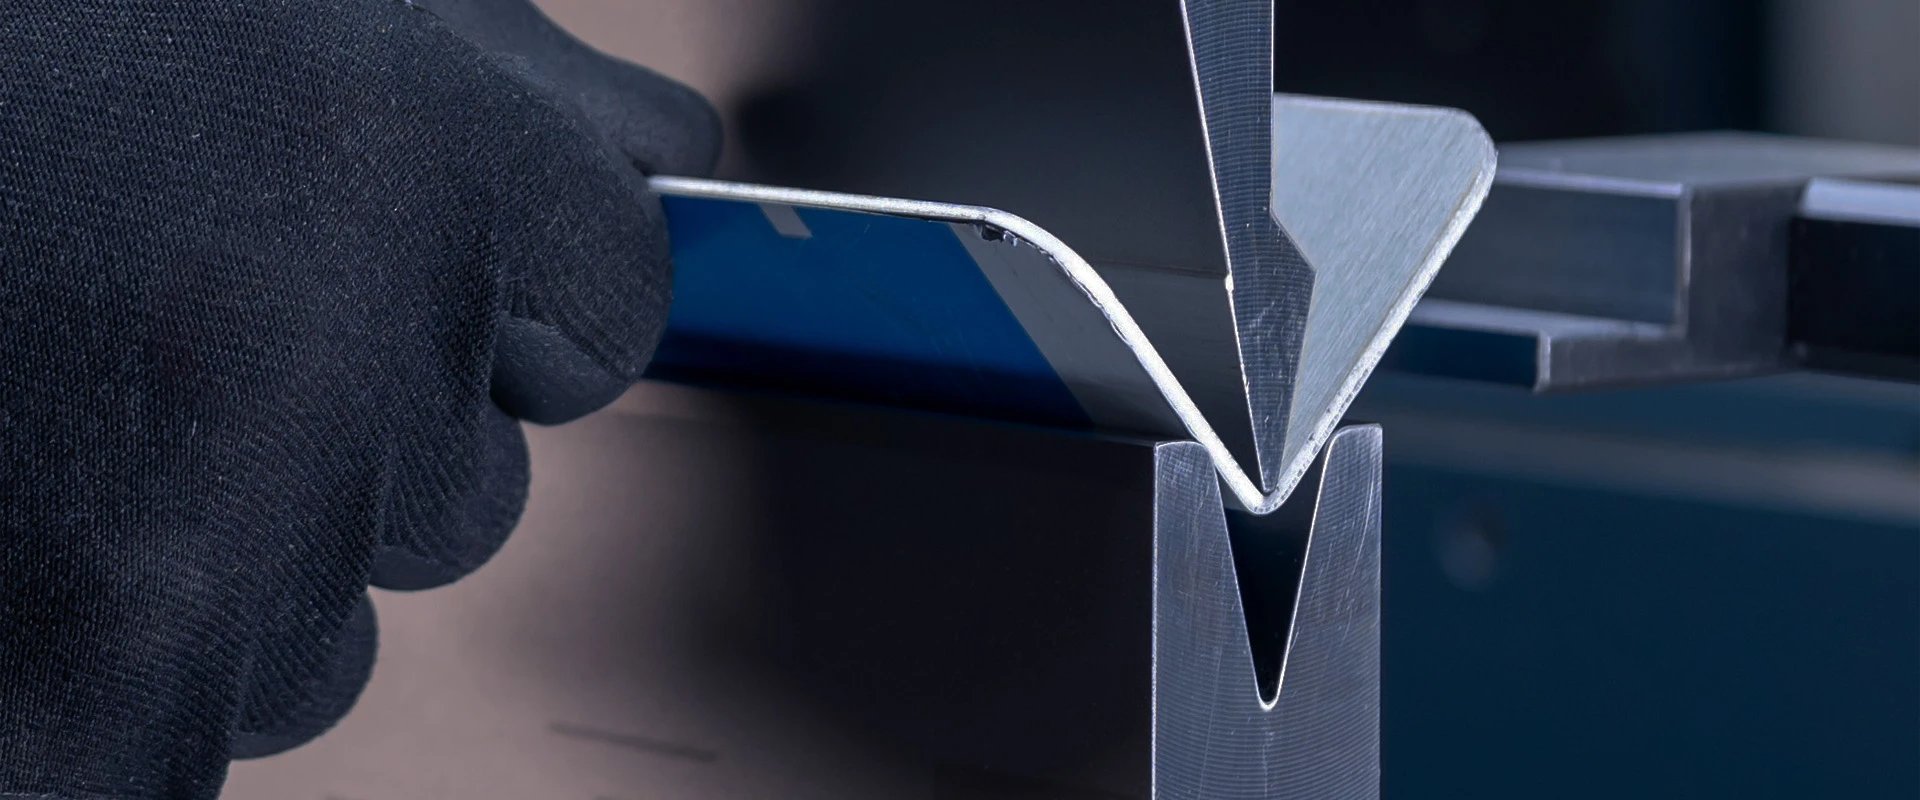
A hydraulic press brake can generate enormous forming force, but no structure is perfectly rigid under load. Even a high-stiffness frame, precision-guided ram, and quality tooling will experience elastic deflection—and that deflection is one of the biggest reasons why long bends can show “tight ends and open middle,” inconsistent angles, or taper across the part.
The good news is that deflection is not a mystery problem. A modern hydraulic press brake manages it through a mix of structural stiffness, controlled crowning, synchronized axis control, and process discipline—so you can hold stable angles, reduce rework, and run longer parts with confidence.
Table of Contents
Understanding What “Accuracy” Means on a Hydraulic Press Brake
Angle accuracy is a system result, not one component
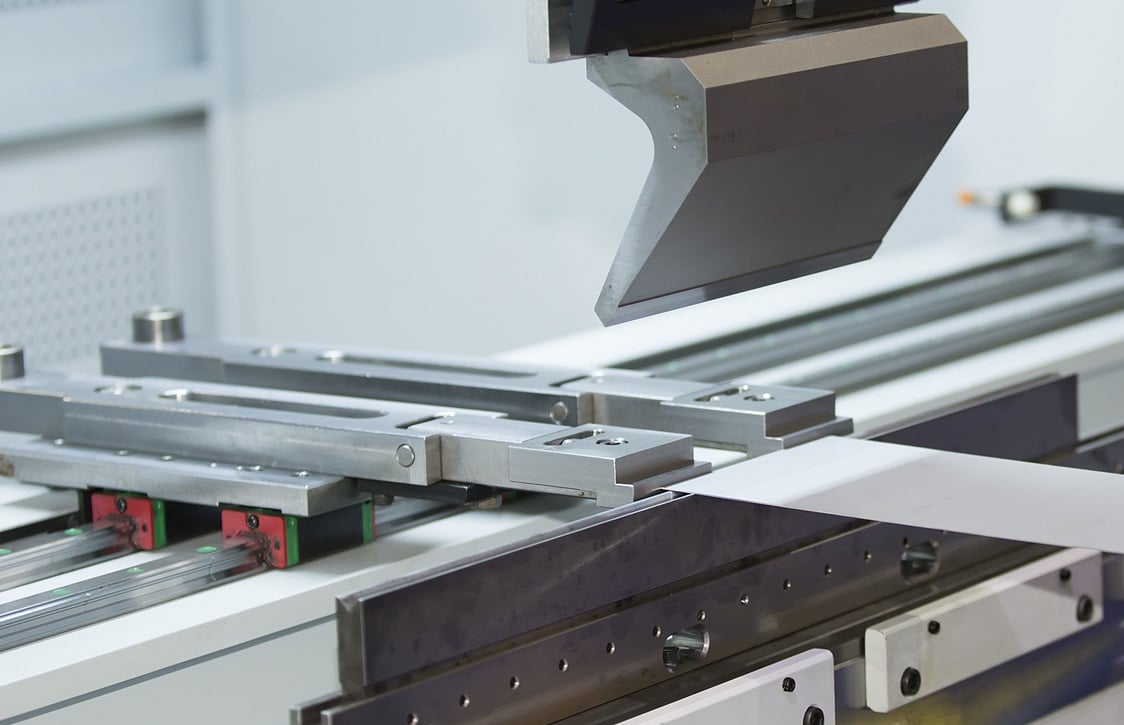
When buyers say they want “high accuracy,” they usually mean final bend angle consistency along the full bend length and across repeated parts. That outcome is influenced by machine deflection, tooling alignment, material variation, and the stability of the Y-axis motion.
A hydraulic press brake can place the ram to a commanded position very precisely, but if the bed and ram separate unevenly under tonnage, the angle will still drift along the part. In other words, position accuracy alone is not the full story—the machine must also actively manage how it behaves under load.
Accuracy vs. repeatability (why both matter)
Two terms are frequently mixed up: accuracy and repeatability. In motion systems, standards like ISO 230-2 define test methods for evaluating the accuracy and repeatability of positioning of numerically controlled axes, which is a useful reference mindset even when you apply it to forming equipment. Iteh Standards
Repeatability answers: “If I command the same position again, do I land in the same place?” Accuracy answers: “Is that place the correct place relative to the target?” If repeatability is strong but accuracy is off, you can often compensate in control. If repeatability is weak, your process will constantly wander and require frequent correction.
Why long parts expose deflection problems first
A short bracket may hide many sins because the loaded span is small and the tooling contact area is limited. But a long bend amplifies deflection because the machine behaves more like a beam system: the center tends to deflect more than the ends, creating a different forming gap along the length.
That’s why many factories report that parts “look fine at 600 mm” but become difficult at 2–3 meters. Once length increases, you must treat deflection management as a core capability—not a nice-to-have.
Where Deflection Comes From in Hydraulic Press Brake Bending
Ram and bed elastic bending under tonnage
In a hydraulic press brake, tonnage is transmitted through the ram, tooling, and bed. Under high load, both ram and bed can elastically bend; the classic symptom is a “smile” shape where the center is effectively farther from the tooling than the ends. Crowning systems exist specifically to counter this behavior by generating an intentional opposite curve. Canadian Metalworking
This does not mean the machine is “weak.” It means the machine is doing exactly what every elastic structure does: it deflects predictably under load, and it must be compensated predictably.
Frame stretch and side-frame opening
Deflection is not only vertical. A press brake frame also experiences side-frame opening and overall elastic stretch, especially during heavy forming on long tooling setups. Some compensation solutions target the bed/ram curve, while others address how the full frame responds to load and where the effective working line shifts.
Practically, you will see this as angle drift when you change the bend length, change material grade, or move from a centered bend to an off-center bend. If the machine’s compensation is “one-size-fits-all,” the angle profile will change as your loading condition changes.
Tooling, clamping, and contact compliance
Even if the machine frame were infinitely stiff, the system would still have compliance in:
- punch/die seating surfaces,
- clamping,
- tooling stack-up tolerances, and
- wear or contamination on contact faces.
This is why experienced operators treat cleanliness, correct clamping torque, and repeatable tool seating as accuracy tools—not as housekeeping. Two identical bends can vary simply because the tooling did not seat identically across the length.
Material variation and springback
Material is rarely perfectly consistent. Tensile strength and thickness tolerances change forming force and springback behavior, which in turn change how much the machine deflects and how the final angle relaxes after unloading.
Even the modulus of elasticity used for engineering estimation is often treated as ~200 GPa for steels, but research and testing show it can vary by grade and thickness, reminding us that material properties introduce real-world spread that the process must absorb. Scholars' Mine
The Physics in Plain Language: How Tiny Deflection Becomes Visible Angle Error
Think of the press brake as a controlled beam system
A useful mental model is beam deflection: if a beam is supported and loaded, it bends according to stiffness (E·I) and load distribution. For a simply supported beam with a uniformly distributed load, classical formulas include maximum midspan deflection proportional to 5wL⁴/(384EI)—which shows why length has such a dramatic effect (L to the fourth power).
Your hydraulic press brake is not literally a simple beam, but the “length sensitivity” lesson holds. When bend length doubles, deflection-related effects can increase far more than linearly, especially when you raise tonnage too.
A practical “factory math” illustration (not a guarantee)
Suppose a long job requires higher force per meter, so you move to a smaller V opening and thicker material. Your required tonnage climbs, and the center of the bed/ram system may separate by only a few tenths of a millimeter more than the ends. That sounds tiny, but in bending geometry, a small change in the forming gap can shift the angle noticeably—particularly in air bending where angle is gap-sensitive.
This is exactly why crowning exists: not because operators lack skill, but because the machine must intentionally “pre-shape” itself so the loaded shape becomes straight and uniform along the length.
Why air bending is especially sensitive
In air bending, the final angle is strongly influenced by depth/position and springback, so small variations in penetration or effective gap across the length can show up as angle variation. Bottoming and coining can reduce sensitivity in some cases, but they usually demand far higher tonnage and can accelerate tool wear—meaning deflection management still matters, just in a different way.
For most modern production, air bending remains the go-to method for flexibility and tool life, which makes predictable deflection compensation one of the highest-ROI accuracy capabilities in a hydraulic press brake.
Deflection Management Methods on a Hydraulic Press Brake (From Basic to High-Precision)
Shimming: the simplest correction, and why it’s limited
The most basic method is shimming—placing shims to adjust the effective support or tool seating so the system compensates the curve. This is often described as an operator-level technique and can be useful for short runs or when retrofitting older equipment.
However, shimming has obvious limits. It is slower to set, harder to repeat across different loads, and it does not dynamically adjust when you change thickness, material grade, or bend length. In a modern factory pursuing stable throughput, shimming is a backup tool—not the primary accuracy strategy.
Mechanical wedge crowning (anti-deflection table): robust and repeatable
A widely used approach is a mechanical anti-deflection table using wedge systems. In principle, wedges move progressively to shape the table into a controlled curve that counteracts bed/beam deflection, producing a constant angular profile along the full working length. CNC MASZYNY
Mechanical crowning is valued because it is relatively robust and can be very repeatable when designed well. It is also less sensitive to hydraulic thermal drift than purely fluid-based approaches, although it still requires correct setup and calibration to reflect real production loads.
Hydraulic crowning: flexible compensation across varying loads
Hydraulic crowning uses controlled hydraulic elements to create an adjustable opposite curve. In practice, this approach can be very effective for jobs that vary in tonnage and length because compensation can be tuned more continuously.
Many industrial solutions describe crowning devices as deflection compensation systems designed to compensate for bed and ram deflections during a bend. That framing is important: the point is not “making the machine bend,” but rather making it bend correctly so the workpiece stays consistent.
CNC-controlled crowning: making compensation practical in daily production
Where many factories see the biggest step-change is CNC-controlled crowning, because it reduces the dependence on operator intuition and speeds changeover. A CNC crowning system can apply a compensation curve based on bend length and force, then fine-tune from measured results, making it practical to run mixed jobs while maintaining stable accuracy.
This matters because deflection is not fixed; it changes with load. If your hydraulic press brake is doing different parts all day, the winning approach is the one that can change compensation quickly, repeatably, and with minimal scrap.
The Numbers You Need: Estimating Force So Compensation Matches Reality
Why force estimation is part of accuracy management
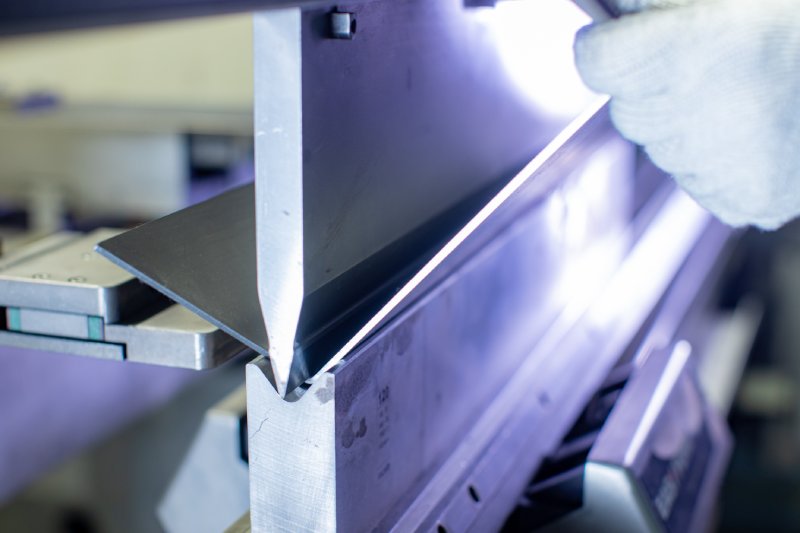
Deflection compensation only works when it matches the real load. If your program assumes a force that is too low, you under-compensate and the middle opens. If your program assumes a force that is too high, you over-compensate and the center goes tight.
This is why accurate tonnage estimation is not just about machine safety—it directly affects angle consistency and crowning correctness.
A commonly used air-bending force formula (metric)
A widely circulated formula for required bending force uses tensile strength, thickness, bend length, and die V opening. One example expression is:
F = (1.42 × σ × S² × L) / (1000 × V) (with consistent units), and guidance such as V ≈ 8 × thickness is often recommended for standard air bending. Intermach
No single formula replaces experience, tooling charts, or real tests. But for production planning, this “first estimate” is extremely useful because it keeps your crowning inputs in the right range and helps prevent avoidable trial-and-error.
Example tonnage chart reference (practical shop-floor tool)
Many factories also use tonnage charts showing force required for air bending mild steel of a reference tensile strength, then adjust proportionally for different materials. This is a practical way to keep force estimates consistent across teams and shifts.
Table 1 — Deflection Sources, What You See, and How a Hydraulic Press Brake Fixes It
| Deflection / Variation Source | Typical Symptom on the Part | Practical Countermeasure |
|---|---|---|
| Ram/bed elastic bending under load | Center angle differs from ends on long bends | Crowning system generating an opposite curve (mechanical or hydraulic) |
| Frame stretch / side-frame opening | Angle changes when tonnage increases or job changes | Stiff frame design + compensation strategy matched to load |
| Tooling seating/clamping compliance | Random-looking angle drift; inconsistent results after tool change | Clean seating faces, repeatable clamping, standardized tooling setup |
| Material thickness/tensile variation | Same program gives different angles on different batches | Force-aware crowning + material-specific programs and test coupons |
| Incorrect force estimation | Over/under crowning; “tight middle” or “open middle” | Use tonnage estimation formula/charts and validate with first-piece inspection |
Each item above has one common theme: the hydraulic press brake must be treated as a repeatable system under load, not just a motion platform. When you align force estimation, compensation method, and standardized setup, accuracy becomes predictable rather than “operator dependent.”
Table 2 — Deflection Compensation Options Compared (What to Choose and When)
| Compensation Approach | Best Fit | Strengths | Limitations |
|---|---|---|---|
| Shimming | Short runs, older machines, emergency correction | Low cost, immediate | Slow, not dynamic, hard to repeat across varying tonnage |
| Mechanical wedge crowning | Mixed production needing reliable repeatability | Robust, good repeatability | Needs calibration; adjustment range depends on design |
| Hydraulic crowning | Wide range of loads and lengths | Continuous adjustability, strong flexibility | Requires stable hydraulics and correct tuning |
| CNC-controlled crowning | High-mix, high-accuracy, fast changeover | Fast setup, repeatable, production-friendly | Needs good process data and first-piece feedback |
For most export-oriented factories, the practical takeaway is simple: if long parts and mixed jobs are your daily reality, CNC-controlled crowning is usually the most efficient route to stable hydraulic press brake accuracy, because it turns deflection management into a repeatable process instead of a craft trick.
How to Measure Deflection Where It Matters: An “Angle Map” Across the Bend
Hydraulic press brake accuracy is not proven by a single angle reading at one spot. It is proven by how consistent the bend angle and flange geometry remain from left to right across the working length, under real tonnage and real cycle conditions.
The most practical approach is to build an angle map (sometimes called a left–center–right check). You bend a representative test part and measure the bend angle at multiple stations along the length, then compare the spread (max minus min). This approach directly reveals whether you are fighting ram/bed deflection, tool seating, material variability, or handling sag.
What to Measure (and What to Record)
Angle is the fastest indicator, but it should not be the only one. A stable hydraulic press brake process records the variables that actually move the result, so the correction is repeatable rather than “operator feel.”
You should measure angle consistency and also validate flange length (especially on parts with critical assemblies). You should also record the “process fingerprint” so the CNC program can be repeated reliably in the next batch, and so the same setup can be transferred between factories.
Recommended production record fields (minimum):
- Material grade and thickness (measured, not only nominal).
- Bend length, V-opening, punch radius, and bending method (air bend/bottoming/coining).
- Crowning value (manual setting or CNC value) and target angle.
- Actual measured angles at multiple stations along the bend.
First-Piece “Angle Map” Template (Use on Long Bends)
| Item | Left End | Left Quarter | Center | Right Quarter | Right End |
|---|---|---|---|---|---|
| Measured angle (°) | |||||
| Deviation from target (°) | |||||
| Notes (tool seating, slip, marking) |
A disciplined hydraulic press brake workflow treats this sheet as a standard step for long bends. It reduces rework because the correction is made before the batch is produced, not after the batch is inspected.
Crowning Setup Workflow That Works in Real Production
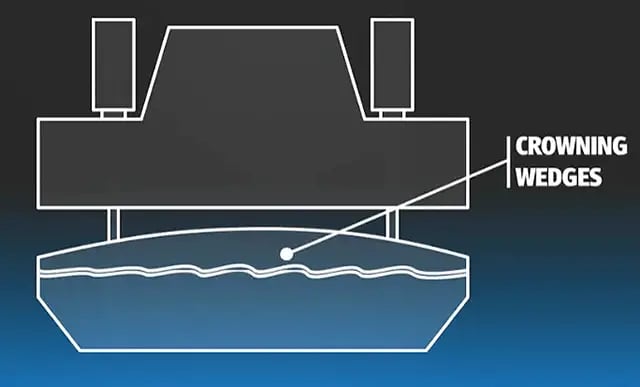
Crowning exists because physics is not optional. Under load, the bed/ram assembly elastically deflects, and a press brake needs a crowning system (in the beam, the table, or both) to keep the bend angle consistent over the full length.
The goal is not “maximum crowning.” The goal is the correct counter-deflection curve for the specific tonnage distribution and bend length, so the punch-to-die relationship remains consistent along the bend line.
Start With a Clean Mechanical Stack (Because Crowning Cannot Fix Bad Seating)
If the punch is not seated correctly, or the die is not fully seated, the machine can look like it has a deflection problem when it actually has a tooling alignment problem. If you apply crowning to compensate for a seating issue, the correction becomes unstable and will drift as the tool settles during production.
A practical rule is to treat crowning as the “final 10% correction.” The first 90% of stability comes from tool clamping integrity, clean contact surfaces, correct tool matching, and consistent gauging.
Establish a Baseline, Then Adjust in Small Steps
A repeatable method is to run a controlled first bend, map the angle, and then adjust crowning in small increments. Manual systems often use wedge adjustment logic; if the center is off compared with both ends, you adjust the center support region rather than chasing ram depth.
A common explanation used in wedge-based crowning is: if the fold is correct at both ends but several degrees open in the center, you tighten wedges in the center region to lift the bed slightly and recover the angle. This same diagnostic logic applies even on hydraulic or CNC crowning—the difference is that the controller moves the curve for you.
Diagnose the Pattern, Not Just the Number
Angle errors have patterns, and each pattern suggests a different root cause. Your operators become dramatically faster when they learn to recognize the pattern and apply the correct fix.
| Angle pattern across length | Most likely cause | Most effective correction |
|---|---|---|
| Center more open than ends | Natural bed/ram deflection not compensated | Increase crowning (or raise mid-zone curve) Selmach™ Machinery |
| Ends more open than center | Over-crowning or edge support issues | Reduce crowning; verify supports and gauging |
| One end consistently off | Tool seating/clamping, alignment, or lateral load | Re-seat tools; verify clamping and alignment |
| Random drift part-to-part | Material variability or temperature drift | Improve material control; stabilize oil temperature and cycle |
This table is deliberately practical. It avoids “theory-only” troubleshooting and pushes directly toward actions that stabilize a hydraulic press brake in production.
From Static Crowning to Closed-Loop Control: Adaptive Bending and Angle Measurement
Static crowning is powerful, but it is still based on an assumption: “the material behaves like last time.” In real factories, material thickness and strength vary more than we want, and the bend result changes even when the machine is perfect.
That is why the industry developed in-process angle measurement and adaptive bending. Adaptive bending measures bend angle during forming and feeds that measurement back to the numerical control, allowing automatic correction during the bending cycle.
Real-Time Angle Measurement: What It Changes
Angle measurement systems can use optical/laser methods to measure the bending angle in real time and transfer results directly to the controller. This changes the operating model from “bend → measure → rebend” to “bend once → confirm during stroke → finish at target.”
Some commercial solutions emphasize refresh-rate capability for real-time measurement, which is a practical indicator of responsiveness in production. Your buyers do not need to memorize the sensor brand; they need to understand the value: fewer trial parts, less operator dependence, and more stability across mixed batches.
What Accuracy Level Is Realistic?
Air bending is flexible and efficient, but it naturally has more variability than bottoming/coining because the final angle depends on penetration depth, springback, and material properties. In classic industry discussion, air bending angle accuracy is often presented around ±0.5° as an approximate figure. MetalForming Magazine
With measurement-based control, some industry references describe bend-angle tolerance improvements toward roughly ±0.2° for precision bending technology. Your marketing should present this carefully: the machine capability is one factor, and the process discipline (tooling, setup, material control) decides whether that capability is achieved on the factory floor.
Technology-to-Outcome Matrix (Use in Buyer Education)
| Approach | What it compensates | Strengths | Typical use case |
|---|---|---|---|
| Manual/mechanical crowning | Predictable deflection curve | Simple, cost-effective | Stable long runs, consistent materials Selmach™ Machinery |
| CNC/hydraulic crowning | Programmed curve by load/length | Fast setup, repeatability | Mixed production, long parts |
| Adaptive bending + sensors | Material variation + springback drift | Fewer trial parts, higher confidence | High-mix, tight-angle tolerances |
This is an effective sales tool because it frames accuracy as a system decision. It also helps the buyer avoid overpaying for sensor systems when their tolerance and part mix do not require it.
Quantifying Load and Deflection: The Numbers That Actually Drive Accuracy
A hydraulic press brake does not “bend metal.” It applies force through tooling over a distance, and the structure elastically reacts to that force. The reason deflection management matters is that structural deflection changes the effective punch penetration along the length.
The good news is that the core scaling laws are simple. If your team understands how tonnage scales, they can predict when crowning will be sensitive and when the process window will be forgiving.
Die Opening Selection and Its Impact
A widely used shop-floor guideline is the “Rule of 8” for V-die opening relative to thickness (V ≈ 8× thickness), which is often presented as a practical rule of thumb for air bending. A bending tonnage chart reference also highlights die openings around 8× thickness (and around 10× thickness above certain thickness ranges), reinforcing the idea that V selection is foundational to load and stability.
V-opening selection matters because it changes required tonnage and it changes radius outcomes. If you select an overly small V to chase a tight inside radius, the tonnage rises sharply and deflection becomes harder to control.
The Core Bending-Force Relationships (Practical Engineering View)
A technical guidance reference summarizes the key proportionalities for V-bending: bending pressure is inversely proportional to V width, proportional to bend length, proportional to the square of thickness, and proportional to tensile strength. These four relationships explain most “mystery” accuracy problems on hydraulic press brakes.
That same reference provides a practical simplified formula form for required tonnage per meter (derived from experimental values and used for planning), showing explicitly how thickness squared and V-width drive load sensitivity. conic.co.jp
Worked Example: Why Crowning Becomes Non-Negotiable on Long Bends
Assume a common air-bending scenario for mild steel-like behavior, using the simplified form P = 68 × t² / V (ton/m) as a planning reference. Use this example to illustrate why small setup changes create big real-world consequences.
- Thickness t = 2.0 mm
- V-opening V = 16 mm (consistent with an 8× guideline)
- Length L = 2.0 m
Step-by-step:
- Compute t²: 2.0² = 4.0.
- Compute tonnage per meter: P = 68 × 4.0 / 16 = 68 × 0.25 = 17 ton/m.
- Total tonnage for 2.0 m: 17 × 2.0 = 34 tons.
Now change only the V-opening (a common “small change” that operators make when tooling availability is limited). If V becomes 12 mm:
- P = 68 × 4.0 / 12 = 272 / 12 = 22.67 ton/m (approx.). conic.co.jp
- Total tonnage: 22.67 × 2.0 = 45.34 tons (approx.).
Nothing about the part drawing changed. However, the machine load increased by about 11.34 tons, which increases deflection and makes angle uniformity harder to maintain, especially at full length.
Chart-Based Reality Check (What Buyers Trust)
A classic press brake tonnage chart states tonnage requirements per linear foot for mild steel at specified strength limits, and it explicitly calls out die openings around 8× thickness for certain ranges. It also notes typical comparative factors for other metals (for example, stainless steel requiring more tonnage than mild steel). cansaw.com
This is why serious buyers ask for your tonnage chart and your crowning specification in the same discussion. They understand that a hydraulic press brake’s accuracy is not a “controller feature,” but a force-and-stiffness system.
Why the Machine’s Elastic Behavior Matters (A Simple Physics Translation)
At the structural level, stiffness depends on geometry and on material elasticity. For steel structures, a commonly referenced modulus of elasticity is around 200 GPa, which is why steel frames are stiff but still elastically deflect under high load. Engineering ToolBox
The significance for buyers is straightforward: on long bends, deflection scales up quickly, so you must counter it with a controlled crowning curve. This is also why “more tonnage” alone does not guarantee accuracy—if stiffness and compensation are not engineered correctly, higher tonnage simply produces larger deflection and more angle spread.
What to Ask for in a High-Accuracy Hydraulic Press Brake (Buyer-Facing Checklist)
Accuracy-driven customers buy hydraulic press brakes differently. They focus less on brochure claims and more on whether the machine includes the engineering elements that keep results stable after installation.
Frame and Table Integrity
A press brake must maintain geometry under load. That means a rigid frame design, stable table structure, and engineered crowning capability appropriate for the working length and tonnage range.
Your sales conversation should connect this directly to outcomes: more rigidity reduces the amount of compensation required, which increases repeatability and reduces sensitivity to minor setup differences.
Axis Positioning, Repeatability, and Verification Discipline
Even though press brakes are not “machine tools” in the cutting sense, accuracy language still benefits from standardized thinking. ISO 230-2 describes test procedures for determining accuracy and repeatability of positioning of numerically controlled axes. ISO
For a buyer, the takeaway is simple: if a supplier can explain how they verify axis positioning and repeatability (and how often), that supplier is speaking the language of controlled accuracy rather than “marketing accuracy.”
Crowning Capability (Not Just “Crowning Included”)
A press brake needs crowning to keep angle consistent over length, and crowning can be located in the beam, the table, or both. In buyer terms, this becomes: “Is the crowning capacity sufficient for my maximum bend length and tonnage, and is it easy to set and repeat?”
If the crowning system is CNC-assisted, it can also reduce setup effort and operator intervention, which directly improves throughput. Selmach™ Machinery
A Practical Accuracy Playbook for Mixed Jobs (What High-Performing Factories Standardize)
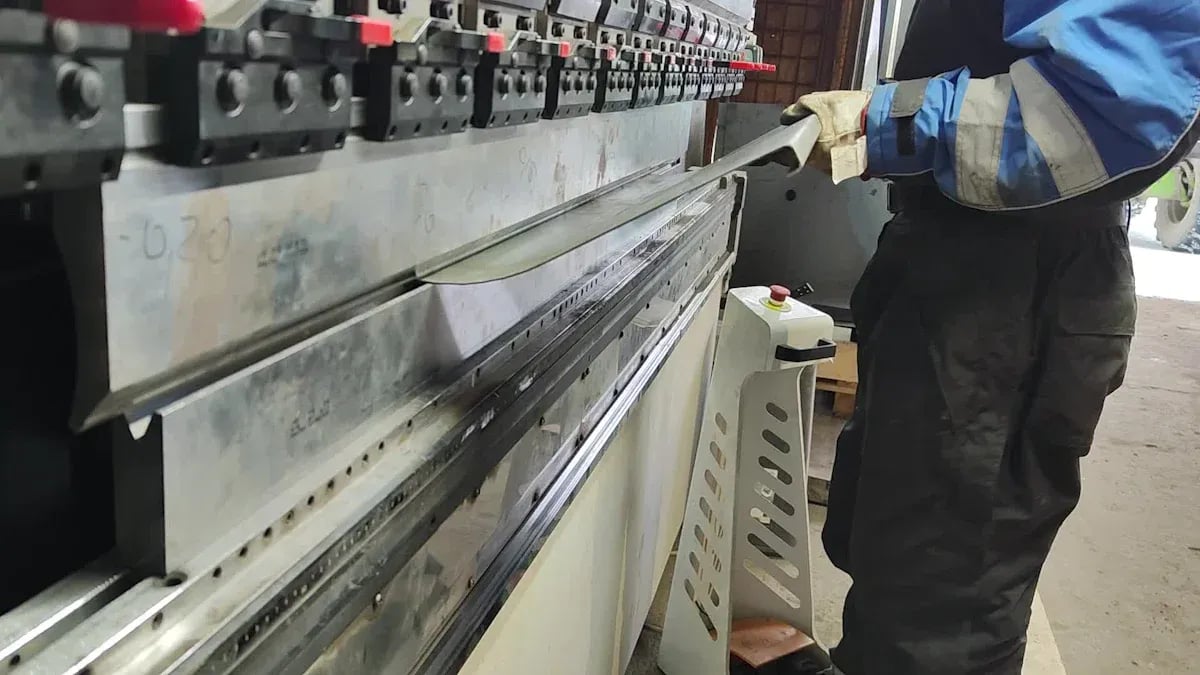
Most accuracy problems blamed on a hydraulic press brake are actually process problems. A reliable factory playbook reduces those problems to a repeatable routine.
Control Material Variability Before You Touch the CNC
Material thickness and mechanical properties vary between batches. If you treat “2.0 mm” as a fact rather than a measured value, you will chase angle all day.
A disciplined approach measures thickness, confirms grain direction when relevant, and standardizes which side faces the punch when cosmetic requirements matter. This makes crowning and depth corrections far more stable.
Standardize Tooling Selection and Don’t Mix “Convenient” V-Openings
V-opening changes are not cosmetic. As shown earlier, V-opening changes tonnage significantly, and tonnage changes deflection, which changes angle spread.
If your production is high-mix, building a small number of standardized V-openings (and documenting which parts use them) often improves accuracy more than any single machine upgrade.
Use Support Strategy on Long Parts (Because Gravity Adds “Fake Deflection”)
Long parts sag. That sag can present as an angle issue, a flange length issue, or a twist that appears after unloading.
For accuracy-driven bending, part supports should be treated as part of the process design. This is especially important when the customer’s assembly requires straightness and consistent return flanges.
How to Evaluate a Hydraulic Press Brake for Accuracy (A Simple Acceptance Test Plan)
If a buyer wants proof, give them a test plan rather than a promise. The best acceptance tests simulate real load at real length and measure results at multiple stations.
Suggested Acceptance Test Matrix (Buyer-Facing)
| Test | Material | Thickness | Bend length | Method | What to measure |
|---|---|---|---|---|---|
| Long bend uniformity | Mild steel | Mid-range | Near max practical | Air bend | Angle map across length |
| Load sensitivity | Same | Two thicknesses | Same | Air bend | Tonnage change vs angle spread |
| Repeatability | Same | Same | Same | Same | Part-to-part angle repeatability |
| Closed-loop demo (optional) | Same | Same | Same | Air bend | First-hit angle control via sensing |
This type of plan makes your marketing credible because it shows you understand accuracy as an engineering outcome, not a slogan. It also makes the buyer feel protected, which accelerates decision-making.
Where KRRASS Fits for Accuracy-Driven Bending
KRRASS positions hydraulic press brakes for global factories that need both throughput and stable quality. The most effective way to sell accuracy is to sell a complete deflection-management strategy, including appropriate crowning configuration, process documentation, and (when required) measurement-based control.
If a customer is struggling with long-part consistency, your strongest offer is a short diagnostic workflow: review their part mix, required tolerances, typical materials, and maximum bend lengths, then recommend the right crowning and verification approach. This aligns the machine specification with the customer’s reality and reduces commissioning risk.
Designing a Hydraulic Press Brake for Stable Accuracy Under Load
Hydraulic press brake accuracy improves dramatically when the machine is designed to behave predictably after tonnage is applied, not only when the ram is moving “no-load.” In practical terms, this means engineering the structure, crowning system, sensing strategy (if used), and verification workflow as one integrated accuracy system.
Deflection management is the center of that system because crowning exists specifically to compensate for normal deflection between the bed and ram, which otherwise changes the resulting bend angle along the length. Canadian Metalworking
Structure first: stiffness reduces sensitivity
A strong crowning system can compensate for deflection, but it is always easier to correct a small, stable deflection than a large, unstable one. A stiffer frame reduces how much compensation is required and also reduces how sensitive the process becomes to small changes in tonnage, material, or tooling.
From a buyer standpoint, this translates to one simple point: two hydraulic press brakes can both “have crowning,” but the one with better stiffness will require fewer trial bends and will hold angle more consistently across a wider variety of parts.
Why length is the hidden multiplier (the L⁴ problem)
Even if you never use beam equations day-to-day, the scaling behavior is extremely instructive for bending. For a simply supported beam under a uniformly distributed load, classical mechanics gives maximum midspan deflection proportional to 5 w L⁴ / (384 E I), meaning deflection grows with length to the fourth power.
That scaling explains why a bend that looks perfect at 1 meter can become challenging at 2 meters, even if everything else remains “similar.” If length doubles and all else is comparable, the L⁴ term alone suggests the deflection tendency can increase by about 16×, which is why long-part accuracy demands crowning and disciplined setup.
Material stiffness assumptions still matter
Many industrial calculations assume steel’s Young’s modulus is “about 200 GPa,” and engineering references discuss that this is common practice across steel grades (even while acknowledging real-world variation). Scholars' Mine
For your hydraulic press brake accuracy story, the implication is practical: even if material stiffness is fairly stable, springback and strength variation still change the required load, and load changes deflection. When buyers complain about angle drift batch-to-batch, the root cause is often load variation more than “machine positioning.”
Crowning Done Right: What Actually Makes It Work
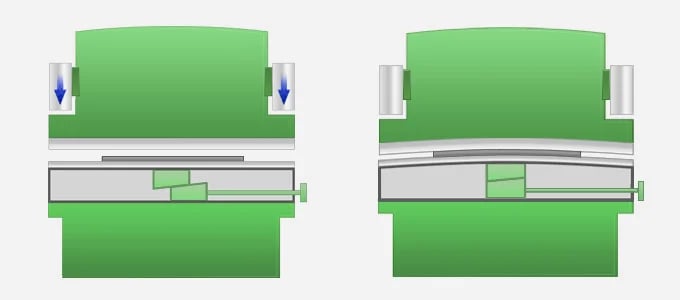
Crowning is not a checkbox feature. Crowning is a controlled counter-deflection curve, and it must be applied correctly across the length to keep punch penetration consistent from left to right.
Crowning must cover the full length, not “most of it”
An adjustable crowning system is most effective when it covers the whole length of the machine, because top tooling must penetrate bottom tooling at the same depth across the entire working area. Wila Tooling
This is one of the most buyer-friendly explanations you can use. It shifts the discussion from vague “accuracy claims” to a physical requirement that any experienced bending engineer recognizes immediately.
Mechanical vs. hydraulic crowning: a decision framework buyers understand
A credible way to explain crowning options is to show how each option behaves in production. Mechanical wedge crowning is typically robust and repeatable, while hydraulic crowning is typically more continuously adjustable across different loads, especially in high-mix production.
Crowning systems are meant to compensate for normal deflection between the bed and ram, so the correct choice depends on how often the customer changes material, thickness, and bend length.
A shop-floor crowning “pattern diagnosis” that reduces guesswork
When a buyer struggles with long-part consistency, they are usually seeing one of three patterns. These patterns can be explained clearly without advanced math, and they guide the correction efficiently.
| Angle pattern across the length | What it usually indicates | Best first correction |
|---|---|---|
| Center more open than ends | Under-compensated deflection | Increase crowning (raise center curve) |
| Center tighter than ends | Over-compensated deflection | Reduce crowning and re-check seating |
| One side consistently off | Tool seating, alignment, or uneven loading | Re-seat tooling, verify clamping, check load symmetry |
This table becomes even more powerful when the customer uses it alongside a simple “left–center–right” angle map. A hydraulic press brake that includes programmable crowning makes these adjustments faster and more repeatable across shifts.
Tooling and V-Opening Selection: Accuracy Starts With the Load You Create
Hydraulic press brake accuracy is highly sensitive to the tonnage you generate. Tooling selection is therefore not only about “forming the shape”; it is a primary lever for controlling load, deflection, and repeatability.
The Rule of 8: a practical starting point, not a law
A widely cited industry guideline is the “Rule of 8,” which states that the V-die opening is about 8× the material thickness for mild steel air bending.
Importantly, multiple references explain that this rule-of-thumb basis is tied to common material assumptions around 60,000 PSI tensile for mild steel charts, which is why the guideline works reliably as a starting point but still needs adjustment for high-strength materials or special radius requirements.
Why V-opening controls deflection risk
When V-opening gets smaller, required tonnage increases quickly. When tonnage increases, deflection increases, and then crowning becomes more sensitive and more critical to achieve consistent angle along the full length.
For buyers, this is a key education point: if they choose a smaller V-opening to chase a tighter inside radius, they should expect higher tonnage demand and should prioritize a hydraulic press brake with a well-engineered crowning system and stable structural stiffness.
Table — What changes load the most (and therefore changes deflection)
| Change you make | What happens to tonnage | What happens to deflection sensitivity |
|---|---|---|
| Increase thickness | Load rises strongly (often dominates the change) | Deflection risk rises sharply, crowning becomes more critical |
| Use smaller V-opening | Load rises | Deflection increases, angle spread is more likely |
| Use stronger material | Load rises | More springback + higher load, so control becomes more important |
| Increase bend length | Total tonnage increases | Long-part angle spread becomes the primary risk |
This is why serious buyers ask about “accuracy” and “tooling strategy” in the same conversation. If a supplier cannot discuss how tooling affects load, their accuracy claims tend to collapse in real production.
Adaptive Bending and Angle Measurement: When You Need Accuracy That Survives Material Variation
Crowning compensates the machine’s structural deflection. Adaptive bending and angle measurement compensate the unpredictable part: material variation, springback drift, and production reality.
Adaptive bending explained in one sentence
An adaptive angle control system controls the angle in real time during the bending process, allowing the machine to adapt to variations in material and compensate for them.
That definition is powerful because it frames the value correctly. It is not “automation for the sake of automation”; it is closing the loop so the first hit is closer to target even when the sheet behaves differently.
Laser-based systems: what they do and why they reduce scrap
Commercial adaptive bending descriptions explain lasers constantly measuring the workpiece angle during bending and adjusting control parameters so the resulting angle matches the defined design, even when thickness or grain variations exist.
Industry discussions of real-time angle measurement similarly emphasize that a true real-time system provides feedback to the machine control so ram positioning produces an accurate bend.
Real-time angle measurement data can be richer than “one angle”
Some angle measurement solutions describe providing real-time angle measurement data that includes inside/outside angles, springback angle information, and related measurement outputs. Lazersafe
In customer language, that means fewer manual corrections, fewer trial parts, and more stable output when the factory runs mixed batches or buys sheet from multiple sources.
What Accuracy and Tolerances Are Realistic (and How to Communicate Them Credibly)
Hydraulic press brake accuracy is often oversold because people confuse “axis positioning” with “bend result.” You can build trust by stating realistic process tolerances and then explaining exactly what technology choices improve them.
Typical bend angle tolerances by method
For general engineering guidance, typical recommendations often cite air bending as being less precise than bottoming and coining, with representative values such as air bending around ±1°, bottoming around ±0.5°, and coining around ±0.25° in some design guidance contexts. Xometry Pro
Some general sources cite air bending angle accuracy around approximately ±0.5° under certain conditions, which is a useful reference point when you explain that real-world outcomes depend on material variation and process control. Wikipedia
How to position this for buyers without overpromising
You can responsibly say: a high-quality hydraulic press brake with robust crowning, stable axes, and a disciplined workflow can deliver consistent angles for most industrial work, and closed-loop measurement systems can reduce trial bends and improve stability when materials vary. This is consistent with how adaptive bending is described in trade literature, where the system adapts to variations and compensates for them during bending.
This approach protects credibility because it ties performance to conditions and control strategy instead of claiming an unrealistic “one number” for every job.
Verification and Acceptance Testing: Borrowing Discipline From ISO Positioning Standards
Even though a hydraulic press brake is not a milling machine, buyers respect standardized test thinking. ISO 230-2:2014 describes methods for testing and evaluating accuracy and repeatability of positioning of numerically controlled axes, which is a useful framework for how to verify CNC motion behavior. ISO
Research discussing ISO 230-2 also notes practical considerations like recommended measurement point density for axes up to certain lengths, which reinforces the idea that verification should be systematic rather than “one measurement and done.” ScienceDirect
Buyer-friendly acceptance test for long-bend deflection control
A practical acceptance test that convinces experienced customers is simple: choose a long bend length relevant to their parts, run an air bend at realistic tonnage, then measure angles at multiple stations across the bend. You then adjust crowning as needed and confirm that the angle spread meets the customer’s tolerance needs.
This directly validates the claim that crowning compensates for bed/ram deflection that affects the resulting angle.
ROI of Deflection Control: Why Crowning and Closed-Loop Features Pay Back
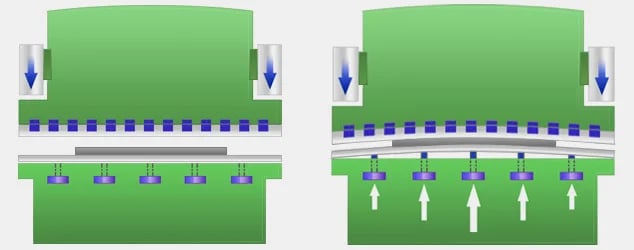
Accuracy features are often evaluated as “added cost,” but bending accuracy almost always produces measurable financial returns. The return usually comes from reduced setup time, reduced scrap, reduced rework, and improved schedule reliability.
A simple ROI model buyers can understand
Below is a conservative template you can use in your marketing and sales conversations. It does not require you to claim a universal payback; it helps the buyer estimate payback using their own numbers.
| Variable | Conservative example | Notes |
|---|---|---|
| Parts per day affected by long bends | 120 parts | Use only the parts where long-length angle spread creates scrap/rework |
| Scrap/rework rate today | 4% | Many factories underestimate this because rework is not logged as scrap |
| Scrap/rework rate after crowning discipline | 1.5% | Improvement comes from fewer trial parts and fewer “angle map failures” |
| Cost per scrapped/reworked part | $18 | Includes labor + material + schedule disruption |
| Annual working days | 250 | Adjust to the customer’s reality |
| Estimated annual savings | $13,500 | (120×250×(4%-1.5%)×$18) |
This table is persuasive because it is transparent and adjustable. It also helps justify why crowning coverage and real-time correction features are not “luxury features” when the customer runs long parts.
FAQ: Hydraulic Press Brake Accuracy and Deflection Management
What causes inconsistent angles along a long bend on a hydraulic press brake?
The most common cause is normal deflection between the bed and ram under load, which changes the effective forming condition along the length. Crowning systems are designed specifically to compensate for that deflection so the bend angle remains consistent.
Does crowning guarantee perfect angles for every material batch?
Crowning compensates the machine’s structural behavior, but it does not eliminate material variation or springback differences. Adaptive bending systems are designed to adapt to material variations and compensate for them during bending, which is why they are often used when batch variability is high.
Why does changing V-die opening affect accuracy so much?
Because V-opening changes required tonnage, and tonnage changes deflection. The “Rule of 8” (V ≈ 8× thickness for mild steel air bending) is widely used as a stable starting point precisely because it balances load and repeatability for common conditions.
When should a factory consider real-time angle measurement?
Factories should consider it when they run high-mix work, when material variability is significant, or when tolerance requirements force them to reduce trial parts. Trade references describe real-time angle control and laser-based adaptive bending as systems that measure angle during forming and adjust to achieve the defined result.
How should a buyer verify a hydraulic press brake’s “accuracy claims”?
They should require a load-relevant test on a bend length similar to their parts, measure angles at multiple stations, and confirm repeatability across several parts. It also helps to apply standardized thinking to axis verification, and ISO 230-2 is a recognized reference for methods that test accuracy and repeatability of positioning of numerically controlled axes. ISO
Practical Closing: How to Sell Accuracy Without Overpromising
If you want your “hydraulic press brake accuracy” positioning to be credible, anchor it in deflection management. You can state clearly that crowning compensates normal bed/ram deflection that would otherwise cause angle variation along long bends, and you can demonstrate it with an angle-map acceptance test.
If the customer’s biggest pain is material variation and springback drift, you then introduce adaptive bending as the next layer: an approach described in trade literature as adapting to material variations and compensating in real time.
