CNC press brake programming is the bridge between what engineering intends and what production actually bends. When that bridge is strong, you get consistent angles, predictable flange lengths, low scrap, and faster changeovers—without relying on “operator instinct” to rescue a shaky flat pattern.
This article walks through a practical, factory-ready workflow: how to read a 2D drawing like a programmer, translate it into an accurate flat, select tooling, plan the bend sequence, and stabilize the job for repeat production. Along the way, I’ll share the same decision points our customers face every day when running a CNC press brake in real-world batch and mixed production.
Table of Contents
Why CNC Press Brake Programming Matters in Real Production

Programming is not just “enter angle and backgauge.” It is a controlled method for managing material variability, tooling constraints, machine deflection, and springback so that the part meets tolerance repeatedly. When programming is treated as a process rather than a button-push, the CNC press brake becomes a predictable forming system instead of a trial-and-error station.
It also directly impacts cost. A good program reduces setup time, prevents tool crashes, shortens first-article cycles, and helps less-experienced operators produce parts that match senior-operator quality. In many factories, programming improvements are the fastest way to increase press brake throughput without buying another machine.
Programming is the “hidden” lever for throughput
Most bending delays come from preventable friction: unclear drawings, wrong die choice, backgauge interference, or missing compensation data. A structured CNC press brake programming method surfaces those issues before metal is loaded, which is why mature factories treat programming as part of process engineering, not just machine operation.
Repeatability starts before the first bend
If your flat length is wrong, no amount of angle correction will fix final dimensions across multiple flanges. A program that manages bend allowance/deduction, tool selection, and sequence planning upfront typically yields fewer adjustments later, especially on tight-tolerance parts.
What “CNC Press Brake Programming” Really Means
A CNC press brake program is a set of bend steps that tells the machine how to form the part: which tools to use, how the part is gauged, what bend depth/angle to target, and what corrections to apply. Depending on the controller and configuration, it may include multi-axis backgauge positions (X/R/Z), crowning settings, bend speed transitions, and angle correction parameters.
In practice, programming is a data workflow. You are converting drawing intent into machine-readable decisions: material type, thickness, bend radius assumptions, V-die opening, bend sequence, and inspection method. If any of those decisions are wrong or undocumented, you will see it as scrap, rework, or “mystery drift” between operators.
Online vs. offline programming
Online programming is done at the controller, often directly from the drawing dimensions and a bend table. It is fast for simple parts, but it depends heavily on the programmer’s judgment and the quality of your bend data.
Offline programming uses CAD/CAM or bending simulation to build the sequence, check collisions, and export bend steps to the CNC press brake. This is especially valuable for complex box parts, high-mix work, and multi-station tooling because you can validate feasibility before tying up the machine.
The core data you must control
Every CNC press brake program is only as stable as its assumptions. Your “must-control” inputs are: material grade, thickness, grain direction (when relevant), inside radius target, V-opening choice, bend method (air vs. bottoming/coining), and the bend deduction/allowance model. The more consistently you manage these, the more your results become predictable across shifts and batches.
Start With the 2D Drawing: Identify Bend-Critical Information
A 2D drawing often looks “complete,” but bend programming needs very specific signals. Before you touch the CNC press brake controller, you should extract the details that control bend length, angle, and appearance. When those are missing, a good programmer clarifies assumptions and documents them.
Think of this as a checklist that prevents downstream disputes. If engineering, programming, and QC interpret the drawing differently, you will burn hours re-bending, re-cutting flats, or reworking cosmetic surfaces.
Material and thickness: the first gate
Material grade and thickness are the strongest drivers of tonnage, springback, and bend deduction. If a drawing calls out “steel” without specifying grade, you should treat it as a risk and align on a standard (for example, mild steel vs. high-strength low-alloy). If the material changes later, the same CNC press brake program may not hold dimensions without adjustment.
Thickness matters even more than many teams expect. Small thickness deviations can move the neutral axis position and change the effective bend deduction enough to push flange lengths out of tolerance on multi-bend parts.
Bend angle, inside radius, and tolerances
Angle is obvious, but inside radius is often under-specified. In air bending, inside radius is strongly influenced by die opening and material behavior rather than punch radius alone, which means the programmer must interpret whether the design expects a formed radius or simply “whatever air bending produces.”
Tolerances tell you where you must be strict. A ±0.2 mm flange tolerance requires a very different approach than a ±1.0 mm tolerance, especially when multiple bends stack up. Tight tolerances usually demand validated bend tables, stable gauging strategy, and consistent tool setup.
Bend direction, datum strategy, and cosmetic faces
A CNC press brake program is also a handling plan. You must know which face is cosmetic, where marks are unacceptable, and which datums QC will measure from. If the drawing does not specify, the factory should define a standard (e.g., keep die marks on the inside, protect cosmetic outside surfaces, and gauge from the most stable flange).
If grain direction matters (common in stainless and certain aluminum applications), it affects cracking risk and springback. That should influence both bend line orientation and tool choice.
Convert the Drawing to a Flat Pattern You Can Trust
The flat pattern is where many bending problems are born. If you start with an incorrect flat length, you can still hit angles, but overall part size will drift—especially on parts with multiple flanges. Strong CNC press brake programming begins by building a flat model you can defend.
This does not require complicated math for every job. It requires a disciplined method for selecting bend allowance/deduction rules and validating them against your tooling and materials.
Bend allowance, bend deduction, and the K-factor in plain language
Bend allowance is the arc length of material consumed in the bend, and bend deduction is the amount you subtract (based on setbacks) to get the final flat length. The K-factor is a way to estimate where the neutral axis sits through the thickness during bending, which is essential for calculating bend allowance accurately. thefabricator.com
In production terms, you do not need to “worship” a theoretical K-factor. You need a bend model that matches your die openings, materials, and bending method, and then you need to keep it consistent.
Why die opening selection changes your flat length
For 90° air bending of steel, a widely used rule of thumb is selecting a V-die opening around 8× material thickness, because it balances force, radius formation, and process stability. thefabricator.com
This matters because changing V-opening changes the formed inside radius and the effective bend deduction. If your CAD flat is based on one V-opening but the CNC press brake is set up with another, you can be “perfect on angle” and still fail final dimensions.
Build a bend table that reflects reality
A practical bend table is not a textbook chart. It is a set of tested values tied to your common materials, thicknesses, and tool sets, often stored in the controller and reused across programs. When you validate a bend table with first-article measurements, you convert bending from “art” into a repeatable process.
If you do high-mix work, start with the most frequent thicknesses and materials. Even a small set of proven bend data can dramatically stabilize CNC press brake programming quality.
Tooling Strategy: Punch, Die, and the Constraints That Decide Everything

Tooling is the physical interface between the program and the metal. Many programming mistakes are actually tooling mistakes: wrong die opening, insufficient clearance, poor segmentation plan, or ignoring minimum flange requirements.
A strong tooling strategy is not “use what’s on the rack.” It is selecting tools that can form the geometry safely, within tonnage, without collisions, and with acceptable marking.
Choosing a V-die opening with intent
The “rule of 8” is useful, but it is not a law. Some tooling providers describe a broader guideline of 6–8× thickness for air bending steel, and deviating from it changes required force, inside radius, and marking behavior. wilatooling.com
In programming terms, you should treat V-opening as a controlled variable. If you must use a different die due to availability, you should also expect to adjust the bend model and possibly the backgauge strategy.
Punch radius, acute tools, and part geometry
Punch radius affects surface contact and risk of cracking, but in air bending the die opening often dominates the resulting inside radius. Acute punches and dies can enable tight returns and complex sequences, but they raise collision risks and require more careful simulation and gauging.
For repeat production, segmented tooling helps you adapt to varying part widths and box shapes. The program should reflect segment layout, especially when gauging near the edge of the tooling set.
Collision avoidance and minimum flange length
Many bends fail not because the machine cannot form the angle, but because the flange cannot be safely supported or gauged. Minimum flange length depends on die opening and tool geometry, so programming must confirm the flange can sit in the die without tipping.
Collision checking is essential for parts with return flanges, deep boxes, and multi-bend sequences. If you only discover interference at the CNC press brake, you lose time and increase the chance of tool damage.
Bend Sequence Planning: Turning Geometry Into a Feasible Process
Sequence planning is where CNC press brake programming becomes true process engineering. Your bend order determines whether the part can be handled, gauged, and formed without obstruction. A part that looks simple on paper can be impossible to bend in the wrong sequence.
The goal is to maintain stable referencing while gradually building the 3D shape. Every bend changes what surfaces are available for gauging and what clearances exist for the next bend.
Inside-out vs. outside-in sequencing
A common approach is bending smaller internal features first, then closing the outer profile. This reduces obstruction but can sacrifice stable referencing if the early bends create uneven contact surfaces.
For box parts, you often need a planned progression that avoids trapping the part against the backgauge or colliding with the punch. Offline simulation is especially valuable here because it shows when a “logical” sequence fails physically.
Backgauge strategy and gauge points
Your backgauge plan should be explicit: which flange is the datum for each step, where the part touches the gauge fingers, and how you prevent slippage. For long parts, consider how bow or twist will affect gauging and whether additional supports are needed.
Stable gauging reduces variation more than aggressive angle correction. If you see inconsistent flange lengths between operators, it is often a gauging issue, not a bend deduction issue.
Handling, flipping, and operator ergonomics
Programming should respect how a human loads the part. If a bend requires an awkward flip that risks dropping or scraping, the program may be technically correct but production-unfriendly.
High-throughput bending is a choreography. The best CNC press brake programs minimize unnecessary flips, standardize orientation, and keep the operator’s handling consistent from piece to piece.
Creating the Program on the CNC Press Brake Controller
Once tooling and sequence are defined, you translate the plan into controller steps. Different controllers have different interfaces, but the logic remains consistent: define the tools, define each bend step, define gauging positions, and apply corrections.
A good program is not only correct—it is also readable. The next operator should understand intent, not guess it.
Tool library discipline
If the tool library is messy, programming becomes slow and error-prone. Tools should be named consistently, with clear geometry data: punch angle/radius, die opening/angle, and usable lengths. When tool data is reliable, the controller (or offline software) can help with collision checking and bend calculations more effectively.
Factories with disciplined tooling libraries usually see fewer “mystery errors” and faster onboarding of new staff. It is one of the highest ROI habits in CNC press brake programming.
Bend steps: angle targets and backgauge positions
Each bend step typically includes target angle (or depth), bend length, and backgauge positions. The programmer should also define approach speed and bending speed transitions for safety and repeatability, especially on short flanges or high-strength materials.
When you program multi-axis backgauges, ensure that the gauge fingers do not interfere with formed flanges. Many crashes happen because a backgauge move was feasible on a flat blank but not feasible after prior bends.
Crowning, deflection, and springback compensation
Long bends and thick materials introduce deflection. Many press brakes rely on crowning systems (mechanical, hydraulic, or CNC-controlled) to maintain angle consistency along the length. If crowning is available, the program should specify it rather than leaving it to operator guesswork.
Springback compensation depends on material and bend method. You may use angle correction routines, bend tables, or test bends to dial in results. Either way, you should document what correction was used and why, so the program remains stable across batches.
From First Piece to Stable Production: Trial Bends and Standardization
Even with excellent planning, the first piece is where reality meets assumptions. The goal of first-article bending is not to “fight the part into tolerance,” but to confirm what needs to be updated in the program, bend data, or setup method so the job becomes repeatable.
This is where experienced factories separate themselves: they convert first-article learning into standardized data rather than repeating the same trial-and-error next month.
Measurement methods that match the tolerance
For general work, a protractor and calipers may be enough. For tight tolerances, you may need a height gauge, angle measurement system, or CMM checks depending on the part’s function.
Measurement should align with drawing datums. If QC measures from a different reference than the operator gauges, you will see disagreement even when the part is “good.”
Typical corrections and what they really mean
If angles are off consistently, you may adjust the angle correction or depth. If flange lengths are off consistently, you may need to adjust bend deduction assumptions or verify backgauge referencing and tool setup.
If variation is inconsistent, look first at handling and gauging. Inconsistent seating against the backgauge or inconsistent pressure on the part can create unpredictable flange length drift, even with a correct flat.
Lock the job with documentation
A production-ready CNC press brake program includes notes: tool setup, segment layout, gauging orientation, and any known risks. If you run multiple shifts, these notes prevent “tribal knowledge loss” and protect consistency.
Over time, this documentation becomes part of your bending knowledge base. It speeds up quoting, process planning, and repeat job launches.
Quality, Safety, and Compliance Built Into Programming

Programming is also risk management. A CNC press brake is a high-force machine tool, and programming decisions directly influence safety: tooling choice, tonnage, part handling, and cycle behavior all matter.
A professional factory treats safe operation as part of the programming and setup process, not a separate checklist done later.
Safety standards and regional compliance
In Europe, EN 12622 is a machine-tool safety standard specifically addressing hydraulic press brakes, and it is often referenced alongside broader risk assessment and functional safety standards. BSI Knowledge
Regardless of region, safety guidance from major OEMs emphasizes hazard recognition during installation, tooling setup, and operation, including safeguarding measures that can be retrofitted. 株式会社アマダ
Tonnage planning to protect the machine and tools
Tonnage is not only “can the press brake bend it.” It is also about staying within safe limits for the machine frame, tooling shoulders, and workholding stability. Practical tonnage calculation guidance highlights step-by-step methods and limit awareness rather than relying on guesswork. thefabricator.com
For programming, tonnage planning should be tied to tool choice and bend length. If a job is close to capacity, you may need a larger die opening, staged bending, or a different machine class.
Process control for repeat orders
Stable production depends on controlling variables: same material source (or verified equivalence), same tooling set, consistent setup, and documented program versions. If a program is edited on the floor without revision control, you lose traceability and invite drift.
Even a simple version naming rule—plus a note of what changed—can protect quality on repeat orders. This is especially important for export customers who expect consistent results across time.
Digital Workflow: CAD/CAM, Simulation, and Reuse of Proven Data
Modern CNC press brake programming is increasingly data-driven. CAD/CAM and simulation do not replace skill, but they reduce uncertainty and shorten the path to a stable first article.
The most effective factories treat bending programs like assets: once validated, they are reused, improved, and standardized rather than reinvented.
From 2D DXF to controlled bending data
Many workflows begin with a DXF flat and a drawing. The risk is assuming the DXF is correct without validating bend rules. A disciplined workflow ties each flat to a bend table and tooling plan so the geometry is reproducible on the CNC press brake.
If you also use 3D models (STEP/IGES), you can compare formed geometry against the drawing and detect ambiguous areas early. That reduces “interpretation gaps” between engineering and the factory floor.
Offline simulation as a collision and feasibility filter
Simulation helps you test sequence feasibility and collision risk before the machine is occupied. This is most valuable for box parts, deep channels, complex returns, and short flanges where gauging is difficult.
Even if your factory does not run full offline programming for every job, using it selectively for high-risk parts typically pays back quickly in avoided setup waste.
Program management and version control
Programs should be stored with revision history, linked to tool setup notes, and ideally linked to the customer’s drawing revision. If the drawing changes, the program should change deliberately, not accidentally.
When program management is mature, operators spend less time “hunting” for the right version. That directly improves OTD (on-time delivery) and reduces rework.
Practical Example: Programming a Simple L-Bracket Correctly
Consider a common part: an L-bracket with one 90° bend, mild steel, and medium tolerance. Even this “simple” part can go wrong if the flat length is assumed incorrectly or the die opening is chosen casually.
A reliable approach starts with clear assumptions. You define material and thickness, select a die opening that matches your bending method, and use a validated bend table rather than guessing a bend deduction.
Step 1: Confirm material, thickness, and bend method
Assume 2.0 mm mild steel and air bending for flexibility. You select tooling that supports stable air bending and acceptable marking for the cosmetic requirement.
For V-die opening, many shops start near 8× thickness for 90° air bending of steel, so you would consider a V around 16 mm, then confirm availability and minimum flange needs. thefabricator.com
Step 2: Build the flat length based on proven data
Instead of inventing a K-factor, you use your bend table for 2.0 mm mild steel with that V opening. That bend table reflects the neutral axis behavior and springback in your tooling and machine environment, which is the practical intent behind K-factor usage. thefabricator.com
You then generate the flat length, cut the blank, and treat the first part as a validation step rather than a production commitment. This mindset prevents repeating the same correction cycle on every future order.
Step 3: Program the CNC press brake for stable gauging
You program the backgauge position so the flange seats consistently, and you choose a bend step that is easy to measure and correct. If you have angle correction features, you apply them after confirming the first bend result rather than before.
Once the part is good, you lock down the program with notes: tool ID, segment setup, and any correction values. That turns a “one-time success” into a repeatable job.
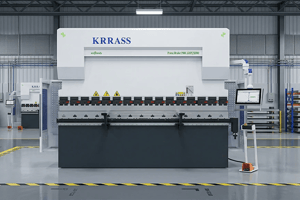
Choosing a CNC Press Brake That Makes Programming Easier
Not all CNC press brakes support the same programming efficiency. When factories evaluate a machine, they often focus on tonnage and length, but programming productivity depends heavily on repeatability, controller usability, and the supporting ecosystem.
A CNC press brake that is easy to program reduces training burden and helps maintain output even when staffing changes.
Mechanical stability and repeatability
Frame rigidity, synchronized ram control, and stable backgauge motion reduce the amount of “correction work” the programmer must do. The more consistent the machine, the more your bend table remains valid across time.
This becomes critical when you run long parts, thicker plates, or tight-angle requirements. Mechanical stability is not marketing—it shows up as fewer adjustments per job.
Controller experience and connectivity
A good interface speeds up tool selection, bend step creation, and program reuse. Connectivity also matters: importing job files, backing up programs, and maintaining revision control becomes much easier when the controller integrates with your factory data workflow.
If you want to scale bending throughput, you want programming to be a process, not a bottleneck. The controller is where that process either becomes smooth or becomes painful.
Service, training, and process support
Even the best CNC press brake needs process support: tooling guidance, bend table setup, troubleshooting, and operator training. Factories that invest in training and standardized programming typically see faster ramp-up and more consistent quality.
At KRRASS, our focus is not only delivering the machine, but also enabling a practical programming workflow that helps customers shorten the path from drawing to stable production. That includes application guidance, process documentation habits, and support for building bend data that matches the customer’s real tooling environment.
Key Takeaways: A Workflow You Can Run Every Day
CNC press brake programming becomes straightforward when you treat it as a controlled process. You start by extracting bend-critical information from the drawing, create a flat pattern tied to real tooling behavior, and select tools and sequences that are physically feasible and easy to gauge.
From there, you build readable programs, validate them with first-article measurement, and convert the learning into bend data and documentation that supports repeat orders. Over time, your CNC press brake stops being a “trial station” and becomes a predictable production asset.