O Prensa dobradeira CNC É um tipo de máquina de dobrar metal controlada por computador. Trata-se de uma grande máquina de conformação a frio projetada para processos de conformação de metais de precisão. Ela dobra chapas metálicas para formar os perfis desejados. Antes de ligar uma prensa dobradeira CNC, é necessário realizar diversos preparativos para garantir a operação segura e adequada da máquina. prensa dobradeira hidráulica. Aqui estão alguns preparos comuns:
Fixando a prensa dobradeira
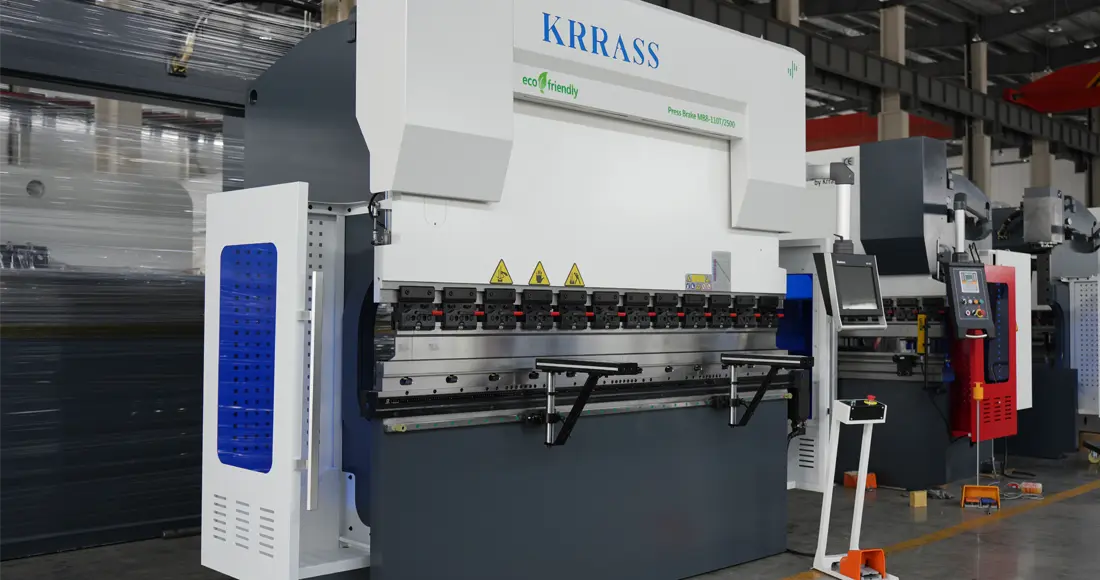
Colocar e garantir um novo prensa dobradeira CNC É um passo importante para garantir a segurança e o uso eficaz do equipamento. Aqui está um procedimento simples para orientar os usuários iniciantes sobre como posicionar e fixar corretamente a prensa dobradeira:
- Selecione um local adequado: Escolha um local estável e fixo para colocar o Pressione o freio. Certifique-se de que a área tenha espaço suficiente para que você possa operar e realizar a manutenção do equipamento livremente. Além disso, garanta uma ventilação adequada no ambiente ao redor para evitar superaquecimento e mau funcionamento da máquina.
- Prepare um terreno firme e estável: Certifique-se de que a superfície onde o equipamento será colocado seja dura, plana e estável. Dê preferência a pisos de concreto ou superfícies metálicas, pois oferecem maior estabilidade. Se o solo não for suficientemente firme, considere adicionar uma placa de metal espessa ou uma tábua de madeira como base.
- Utilize calços e parafusos de nivelamento: Antes de posicionar a prensa dobradeira, utilize calços e parafusos de nivelamento para garantir que o equipamento esteja estável e nivelado. Isso ajudará a equilibrar a máquina e evitar problemas causados por irregularidades no terreno. Ajuste os parafusos gradualmente, seguindo o guia de instalação do equipamento, até que a máquina esteja estável e equilibrada. Cada prensa dobradeira fabricada pela KRRASS é equipada com parafusos de nivelamento nos quatro cantos da estrutura da máquina.
- Aperte a prensa dobradeira: Após posicionar a prensa dobradeira no local adequado e nivelá-la, é necessário fixá-la ao solo para evitar qualquer movimento ou vibração durante a operação. Utilize parafusos ou dispositivos de ancoragem adequados para fixar a base ou os pés da prensa dobradeira ao solo.
- Verificar fixação e estabilidade: Após fixar a prensa dobradeira ao solo, inspecione cuidadosamente a estabilidade do equipamento. Certifique-se de que todos os pontos de fixação estejam firmes e seguros. Tente movimentar o equipamento empurrando-o ou sacudindo-o levemente para garantir que não haja qualquer movimento ou vibração perceptível.


Sobre a correção horizontal da fuselagem
Para corrigir a posição horizontal da prensa dobradeira, é necessário utilizar um nível de bolha. O processo de calibração específico é o seguinte:
1. Coloque a régua de nível no meio da bancada da prensa dobradeira para correção horizontal;
2. Posicione a régua de nível longitudinalmente em ambas as extremidades da viga do eixo X da dobradeira, uma de cada vez, para corrigir o ângulo de inclinação horizontal dos lados esquerdo e direito da dobradeira;
3. O nível só está nivelado quando a bolha do nível de bolha estiver no meio.


Observe que este é apenas um guia básico de procedimentos e que o processo de instalação específico pode variar dependendo do modelo da prensa dobradeira. Para garantir a instalação e o funcionamento corretos, consulte sempre o guia de instalação e o manual do usuário do equipamento e, se necessário, entre em contato com a equipe de assistência técnica.
Adicionando óleo hidráulico
Adicionar óleo hidráulico à prensa dobradeira hidráulica é uma etapa importante para garantir seu funcionamento e uso adequados. Aqui está um procedimento simples sobre como adicionar óleo hidráulico corretamente à prensa. prensa dobradeira hidráulica:
- Prepare os materiais necessários: Antes de adicionar óleo hidráulico, certifique-se de ter os seguintes materiais à mão:
- Óleo hidráulico adequado para sua prensa dobradeira hidráulica (consulte o manual do equipamento ou entre em contato com a equipe de assistência técnica para obter recomendações).
- Filtro de óleo hidráulico (se aplicável)
- Funil ou bomba manual (para adicionar óleo hidráulico)
- Localize a porta de enchimento de óleo hidráulico: Localize o bocal de enchimento de óleo hidráulico na prensa dobradeira hidráulica. Normalmente, o bocal de enchimento está localizado acima do reservatório de óleo hidráulico do equipamento. Consulte o manual do usuário da prensa dobradeira ou as orientações fornecidas pela equipe de assistência técnica para garantir que você encontre o bocal de enchimento correto.
- Limpe a área de trabalho: Antes de começar a adicionar óleo hidráulico, é essencial limpar a área ao redor do bocal de enchimento. Use um pano limpo ou papel-toalha para limpar o bocal e evitar que impurezas ou sujeira entrem no sistema hidráulico.
- Instale o filtro de óleo hidráulico (se aplicável): Se a prensa dobradeira hidráulica estiver equipada com um filtro de óleo hidráulico, instale-o corretamente no bocal de enchimento. O filtro de óleo hidráulico ajuda a remover impurezas e contaminantes do óleo, mantendo a limpeza e o funcionamento normal do sistema hidráulico.
- Adicione óleo hidráulico: Despeje lentamente o óleo hidráulico no bocal de enchimento, utilizando um funil ou bomba manual para evitar derramamentos. Adicione o óleo hidráulico gradualmente e monitore o nível utilizando o sistema hidráulico do equipamento. Certifique-se de que a altura do óleo hidráulico seja metade da altura do bocal de detecção e feche o bocal de enchimento após adicionar o óleo.
- Monitore o nível e a pressão do óleo: Durante o processo de enchimento com óleo hidráulico, monitore sempre o nível e a pressão do óleo. Certifique-se de que o nível do óleo hidráulico esteja dentro da faixa adequada e feche a válvula de enchimento assim que o óleo for adicionado.

Observe que o processo acima é apenas uma orientação básica. Para garantir a adição correta de óleo hidráulico e evitar possíveis danos, consulte sempre o manual do proprietário. Pressione o freio‘Consulte o manual do usuário e siga as orientações fornecidas pela equipe de assistência técnica. Se tiver dúvidas ou não tiver experiência com esse processo, é melhor procurar a ajuda de técnicos profissionais ou pessoal experiente.
Conectando a fonte de alimentação
Conectar a fonte de alimentação de uma prensa dobradeira hidráulica recém-adquirida é uma etapa importante para garantir seu funcionamento e uso adequados. Aqui está um procedimento simples sobre como conectar corretamente a fonte de alimentação de uma prensa dobradeira hidráulica:

1. Confirme os requisitos de energia: Antes de conectar a fonte de alimentação, confirme os requisitos de energia da prensa dobradeira hidráulica. Consulte as especificações da prensa, o manual do usuário ou as informações fornecidas pela assistência técnica para entender a tensão, a fase e a frequência necessárias para o seu funcionamento.
2. Prepare o cabo de alimentação: Com base nos requisitos de energia da prensa dobradeira hidráulica, selecione um cabo de alimentação adequado. Certifique-se de que a corrente e a tensão nominais do cabo de alimentação estejam de acordo com os requisitos do equipamento. Se necessário, adquira um cabo de alimentação que atenda às normas vigentes.
3. Verifique a tomada elétrica: Verifique se a tomada elétrica utilizada para a conexão de energia atende aos requisitos da prensa dobradeira hidráulica. Certifique-se de que a tensão, a fase e a frequência da tomada correspondam aos requisitos do equipamento. Além disso, verifique se o aterramento da tomada é confiável para garantir uma conexão elétrica segura.
4. Conecte o cabo de alimentação: Conecte o cabo de alimentação selecionado à tomada elétrica na sequência correta. Certifique-se de que a extremidade do cabo de alimentação esteja totalmente conectada à tomada e verifique se o plugue está firmemente inserido na tomada.
5. Inspecione a conexão de energia: Após conectar o cabo de alimentação à tomada, inspecione cuidadosamente a conexão. Certifique-se de que o cabo de alimentação não apresente danos visíveis ou folgas. Verifique se o cabo de alimentação está conectado corretamente à porta de entrada de energia da prensa dobradeira hidráulica.
6. Teste de inicialização: Após conectar a fonte de alimentação, realize um teste de funcionamento para verificar se o motor principal da prensa dobradeira hidráulica está operando corretamente (esta etapa pode ser ignorada caso você tenha adquirido uma prensa dobradeira com sistema de alimentação servo-híbrido).
6.1. Ligue a alimentação principal do painel de distribuição de energia: Antes de ligarmos a máquina, precisamos fechar a porta do painel de distribuição de energia da prensa dobradeira hidráulica e girar a alavanca do painel elétrico no sentido horário até travá-la. Nesse momento, a alimentação do painel elétrico principal também será ligada.


6.2. Ligue a fonte de alimentação de controle: Insira a chave de alimentação do controle e gire-a para a direita. Nesse momento, o controle será ligado e o indicador de energia acenderá.


6.3. Verifique todos os botões de parada de emergência: Verifique os botões de parada de emergência no painel elétrico, no controlador e no pedal, e faça-os retornar à posição aberta.


6.4. Ligue a bomba de óleo: Ao pressionar o botão de partida da bomba de óleo, a luz indicadora verde no botão acende, indicando que a bomba de óleo principal da prensa dobradeira hidráulica está ligada e começa a funcionar.


- Se as pás do ventilador do motor principal girarem no sentido horário, isso indica que a sequência de fases da alimentação está conectada corretamente e você pode prosseguir com os próximos passos.
- Se as pás do ventilador do motor principal girarem no sentido anti-horário, isso indica que a sequência de fases da energia está conectada incorretamente e que é necessário inverter duas fases quaisquer da linha de energia trifásica na tomada.
Após confirmar a sequência de fases da alimentação, observe o visor ou as luzes indicadoras do equipamento para garantir que ele ligue e funcione normalmente.


Observe que o processo acima é apenas um guia básico. Para garantir a conexão correta da fonte de alimentação e evitar possíveis riscos, consulte sempre o manual do proprietário. Pressione o freio‘Consulte o manual do usuário e siga as orientações fornecidas pela equipe de serviço. Se você tiver dúvidas ou não tiver experiência com esse processo, é melhor procurar a ajuda de eletricistas profissionais para concluir a conexão elétrica.
Estas são as preparações necessárias antes de ligar uma prensa dobradeira. Esperamos que esta informação tenha sido útil. Se já concluiu estes passos, pode continuar a ler o nosso próximo artigo:


