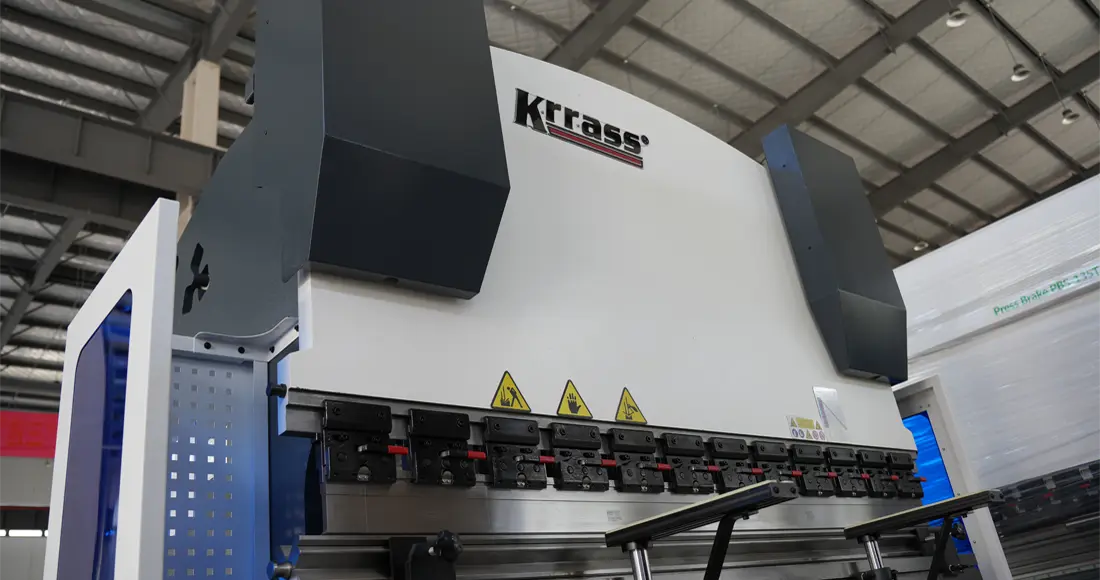
Presse plieuse à commande numérique is a type of press brake that uses a numerical control (NC) system to control the bending process. This makes it a more precise and efficient tool than traditional press brakes, and allows it to produce more complex parts.
Before starting the NC press brake with E21, several preparations need to be done to ensure the safe and normal operation of the presse plieuse hydraulique. Here are some common preparations:
Securing the NC press brake
Placing and securing your new NC press brake is an important step in ensuring the safe and efficient use of the equipment. Here is a simple procedure to guide first-time users on how to properly position and secure a NC press brake:
- Select a suitable location: Choose a stable and stationary location to place the Presse plieuse à commande numérique. Ensure that the area has enough space for you to freely operate and maintain the equipment. Additionally, ensure proper ventilation in the surrounding environment to prevent overheating and machine malfunctions.
- Prepare a firm and stable ground: Assurez-vous que la surface sur laquelle l'équipement sera installé est dure, plane et stable. Privilégiez les sols en béton ou les surfaces métalliques, car elles offrent une meilleure stabilité. Si le sol n'est pas suffisamment stable, envisagez d'ajouter une plaque de métal épaisse ou une planche de bois comme fondation.
- Use shims and leveling bolts: Before placing the press brake, use shims and leveling bolts to ensure the equipment is stable and level. This will help balance the machine and prevent issues caused by uneven ground. Gradually adjust the bolts according to the installation guide of the equipment until the machine is stable and balanced. Each NC press brake manufactured by KRRASS is equipped with leveling bolts at the four corners of the machine frame.
- Secure the NC press brake: After placing the press brake in the appropriate position and leveling it, it needs to be secured to the ground to prevent any movement or shaking during operation. Use suitable bolts or anchoring devices to secure the base or feet of the press brake to the ground.
- Check for fixation and stability: Une fois la machine à rainurer en V fixée au sol, vérifiez soigneusement sa stabilité. Assurez-vous que tous les points de fixation sont bien serrés. Essayez de la déplacer en la poussant ou en la secouant légèrement pour vous assurer qu'elle ne présente aucun mouvement ou vibration perceptible.


À propos de la correction horizontale du fuselage
Pour corriger l'horizontalité de la presse plieuse, vous devez utiliser un niveau à bulle. La procédure d'étalonnage est la suivante :
1. Use a level ruler and place it in the middle and both sides of the NC press brake workbench in turn for horizontal correction;
2. The level ruler is placed in the middle of the workbench of the NC press brake and placed horizontally to correct the horizontal position of the left and right sides of the NC press brake;
3. The level ruler is placed longitudinally at both ends of the NC press brake workbench, and is used to correct the horizontal position of the front and rear sides of the NC press brake;


Veuillez noter qu'il s'agit d'un guide de procédure simplifié et que la procédure d'installation précise peut varier selon le modèle de la fraiseuse à rainurer en V. Pour une installation et un fonctionnement corrects, veuillez toujours vous référer au guide d'installation et au manuel d'utilisation de l'équipement, et contacter le service technique si nécessaire.
Adding Hydraulic Oil
Adding hydraulic oil to the NC press brake is an important step to ensure its proper operation and use. Here is a simple procedure on how to correctly add hydraulic oil to the presse plieuse hydraulique:
- Prepare the required materials: Before adding hydraulic oil, ensure that you have the following materials ready:
- Hydraulic oil suitable for your NC press brake (refer to the equipment manual or consult service personnel for recommendations)
- Hydraulic oil filter (if applicable)
- Funnel or manual pump (for adding hydraulic oil)
- Locate the hydraulic oil filling port: Locate the hydraulic oil filling port on the hydraulic press brake. Typically, the filling port is located above the hydraulic oil tank of the equipment. Refer to the press brake user manual or the guidance provided by service personnel to ensure you find the correct filling port.
- Clean the work area: Before starting to add hydraulic oil, it is essential to clean the area around the hydraulic oil filling port. Use a clean cloth or tissue to wipe the filling port to prevent any impurities or dirt from entering the hydraulic system.
- Install the hydraulic oil filter (if applicable): If the hydraulic press brake is equipped with a hydraulic oil filter, properly install it on the filling port. The hydraulic oil filter helps remove impurities and contaminants from the oil, maintaining the cleanliness and normal operation of the hydraulic system.
- Add hydraulic oil: Slowly pour the hydraulic oil into the filling port, using a funnel or manual pump to avoid spillage. Determine the required hydraulic oil capacity based on the equipment's user manual or manufacturer's recommendations. Gradually add the hydraulic oil and monitor the oil level using the hydraulic system of the equipment.
- Monitor oil level and pressure: During the hydraulic oil filling process, the oil level and pressure of the hydraulic oil should be monitored frequently. Make sure that the height of the hydraulic oil is half the height of the detection port, and close the oil filling port after adding oil.


Please note that the above process is a basic guideline. To ensure proper hydraulic oil addition and avoid potential damage, always refer to the Presse plieuse à commande numérique's user manual and follow the guidance provided by service personnel. If you are uncertain or lack experience with this process, it is best to seek assistance from professional technicians or experienced personnel.
Install the encoder (some models)
Some types of press brakes may not have an encoder installed when you receive them, which requires you to install the encoder on the top of the oil pump of the press brake.
1. Install the two encoders on the left and right sides of the press brake according to the positions shown in the figure, and tighten the four fixing screws in sequence;

2. The connector between the encoder and the oil pump is an o-shaped device, and there are screw tops on the top and bottom sides that can be tightened. You need to tighten them to ensure the normal operation of the encoder.


Connecting Power Supply
Connecting the power supply for a newly purchased NC press brake is an important step to ensure its proper operation and use. Here is a simple procedure on how to correctly connect the power supply for a NC press brake:

1. Vérifier les besoins en alimentation : Avant de brancher l'alimentation, vérifiez les caractéristiques électriques requises de la presse plieuse hydraulique. Consultez les spécifications de la presse plieuse, son manuel d'utilisation ou les informations fournies par le service après-vente pour connaître la tension, la phase et la fréquence nécessaires à son fonctionnement.
2. Préparez le cordon d'alimentation : En fonction des besoins en énergie de la presse plieuse hydraulique, choisissez un câble d'alimentation adapté. Assurez-vous que l'intensité et la tension nominales du câble correspondent aux exigences de l'équipement. Si nécessaire, procurez-vous un câble d'alimentation conforme aux normes.
3. Vérifiez la prise de courant : Vérifiez que la prise de courant utilisée pour le raccordement électrique est conforme aux exigences de la presse plieuse hydraulique. Assurez-vous que la tension, la phase et la fréquence de la prise correspondent aux spécifications de l'équipement. De plus, vérifiez que la mise à la terre de la prise est fiable afin de garantir une connexion électrique sûre.
4. Branchez le cordon d'alimentation : Branchez le cordon d'alimentation sélectionné à la prise de courant en respectant l'ordre indiqué. Assurez-vous que l'extrémité du cordon est bien branchée à la prise et que la fiche est correctement insérée.
5. Inspect the power connection: Once the power cord is connected to the socket, carefully inspect the power connection. Ensure that the power cord doesn't have any obvious damage or looseness. Verify that the power cord is properly connected to the power input port of the NC press brake.
6. Power-on test: After connecting the power supply, perform a power-on test:
6.1 First check the emergency stop button on the controller panel of the NC press brake and the foot switch, and turn them clockwise to restore them;


6.2 Turn on the main power knob on the electric cabinet;


6.3 Turn the main power key on the controller panel clockwise to turn on the main power of the controller;


4. Quickly click the start and stop buttons of the main motor of the oil pump of the NC press brake in turn, and observe whether the main motor is running normally (if you purchased a bending machine with a servo hybrid system, you can skip this step). When turning on and off the main motor quickly, pay attention to the rotation direction of the fan blade at the end of the main motor on the back of the fuselage:
- If the fan blades of the main motor rotate clockwise, it indicates that the power phase sequence is connected correctly, and you can proceed with the next steps.
- If the fan blades of the main motor rotate counterclockwise, it indicates that the power phase sequence is connected incorrectly, and you need to interchange any two phases of the three-phase power line in the socket.


After confirming the power phase sequence, observe the display screen or indicator lights of the equipment to ensure that it starts up and operates normally.
Please note that the above process is a basic guideline. To ensure proper power supply connection and avoid potential hazards, always refer to the Presse plieuse à commande numérique's user manual and follow the guidance provided by service personnel. If you are uncertain or lack experience with this process, it is best to seek assistance from professional electricians to complete the power connection task.
These are the preparations that need to be done before starting NC press brake. We hope this information has been helpful.


