El Prensa plegadora CNC Es un tipo de máquina dobladora de metal controlada por computadora. Es una gran máquina de conformado en frío diseñada para procesos de conformado de metal de precisión. Dobla láminas metálicas para formar los perfiles deseados. Antes de poner en marcha una prensa plegadora CNC, se deben realizar varios preparativos para garantizar su funcionamiento seguro y correcto. prensa plegadora hidráulica. A continuación se presentan algunas preparaciones comunes:
Aseguramiento de la prensa plegadora
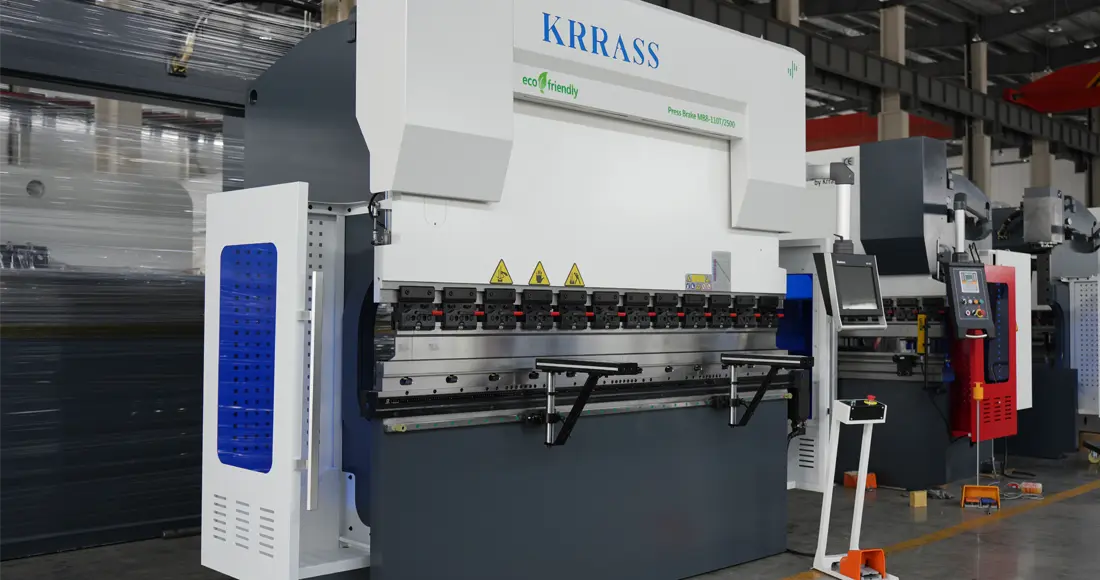
Colocación y fijación de un nuevo prensa plegadora CNC Es un paso importante para garantizar la seguridad y el uso eficaz del equipo. A continuación, se presenta un procedimiento sencillo para guiar a los usuarios primerizos sobre cómo colocar y asegurar correctamente la prensa plegadora:
- Seleccione una ubicación adecuada: Elija una ubicación estable y estacionaria para colocar el prensa plegadora. Asegúrese de que el área tenga suficiente espacio para operar y realizar el mantenimiento del equipo con libertad. Además, asegúrese de que el entorno esté bien ventilado para evitar el sobrecalentamiento y el mal funcionamiento de la máquina.
- Prepare un terreno firme y estable: Asegúrese de que la superficie donde se colocará el equipo sea dura, plana y estable. Priorice los pisos de concreto o las superficies metálicas, ya que proporcionan mayor estabilidad. Si el suelo no es lo suficientemente firme, considere agregar una placa metálica gruesa o una tabla de madera como base.
- Utilice calzas y pernos niveladores: Antes de colocar la prensa plegadora, utilice calzas y pernos niveladores para asegurar que el equipo esté estable y nivelado. Esto ayudará a equilibrar la máquina y evitará problemas causados por desniveles del terreno. Ajuste gradualmente los pernos según la guía de instalación del equipo hasta que la máquina esté estable y equilibrada. Todas las prensas plegadoras fabricadas por KRRASS cuentan con pernos niveladores en las cuatro esquinas del bastidor.
- Asegure la prensa plegadora: Tras colocar la prensa plegadora en la posición adecuada y nivelarla, es necesario fijarla al suelo para evitar movimientos o vibraciones durante el funcionamiento. Utilice pernos o dispositivos de anclaje adecuados para fijar la base o las patas de la prensa plegadora al suelo.
- Comprobar la fijación y estabilidad: Una vez fijada la prensa plegadora al suelo, inspeccione cuidadosamente su estabilidad. Asegúrese de que todos los puntos de fijación estén firmes y seguros. Intente mover el equipo empujándolo o sacudiéndolo suavemente para asegurarse de que no se mueva ni tiemble de forma perceptible.


Sobre la corrección horizontal del fuselaje
Para corregir la posición horizontal de la prensa plegadora, utilice un nivel de burbuja. El proceso de calibración específico es el siguiente:
1. Coloque la regla de nivel en el centro del banco de trabajo de la prensa plegadora para realizar la corrección horizontal;
2. Coloque la regla de nivel longitudinalmente en ambos extremos de la viga del eje X de la máquina dobladora, uno por uno, para corregir el ángulo de inclinación horizontal de los lados izquierdo y derecho de la prensa plegadora;
3. Sólo cuando la burbuja del nivel esté en el medio, estará nivelado.


Tenga en cuenta que esta es solo una guía básica de procedimientos y que el proceso de instalación específico puede variar según el modelo de la prensa plegadora. Para garantizar una instalación y un funcionamiento correctos, consulte siempre la guía de instalación y el manual de usuario del equipo, y consulte al personal de servicio técnico si es necesario.
Adición de aceite hidráulico
Añadir aceite hidráulico a la prensa plegadora hidráulica es un paso importante para garantizar su correcto funcionamiento y uso. A continuación, se presenta un procedimiento sencillo para añadir aceite hidráulico correctamente. prensa plegadora hidráulica:
- Prepare los materiales necesarios: Antes de agregar aceite hidráulico, asegúrese de tener listos los siguientes materiales:
- Aceite hidráulico adecuado para su prensa plegadora hidráulica (consulte el manual del equipo o consulte al personal de servicio para obtener recomendaciones)
- Filtro de aceite hidráulico (si corresponde)
- Embudo o bomba manual (para agregar aceite hidráulico)
- Localice el puerto de llenado de aceite hidráulico: Localice el puerto de llenado de aceite hidráulico en la prensa plegadora hidráulica. Normalmente, el puerto de llenado se encuentra encima del tanque de aceite hidráulico del equipo. Consulte el manual del usuario de la prensa plegadora o las instrucciones del personal de servicio para encontrar el puerto de llenado correcto.
- Limpiar el área de trabajo: Antes de empezar a añadir aceite hidráulico, es fundamental limpiar la zona alrededor del puerto de llenado. Utilice un paño o pañuelo de papel limpio para evitar la entrada de impurezas o suciedad en el sistema hidráulico.
- Instale el filtro de aceite hidráulico (si corresponde): Si la prensa plegadora hidráulica cuenta con un filtro de aceite hidráulico, instálelo correctamente en el puerto de llenado. Este filtro ayuda a eliminar impurezas y contaminantes del aceite, manteniendo la limpieza y el funcionamiento normal del sistema hidráulico.
- Añadir aceite hidráulico: Vierta lentamente el aceite hidráulico en el puerto de llenado, utilizando un embudo o una bomba manual para evitar derrames. Añada gradualmente el aceite hidráulico y controle el nivel mediante el sistema hidráulico del equipo. Asegúrese de que la altura del aceite hidráulico sea la mitad de la altura del puerto de detección y cierre el puerto de llenado después de añadir aceite.
- Monitorizar el nivel y la presión del aceite: Durante el llenado de aceite hidráulico, supervise siempre el nivel y la presión del mismo. Asegúrese de que el aceite hidráulico esté dentro del rango adecuado y cierre el puerto de llenado una vez añadido.

Tenga en cuenta que el proceso anterior es una guía básica. Para garantizar la correcta adición de aceite hidráulico y evitar posibles daños, consulte siempre la prensa plegadora‘Lea el manual del usuario y siga las instrucciones del personal de servicio. Si no está seguro o no tiene experiencia con este proceso, le recomendamos buscar la ayuda de técnicos profesionales o personal con experiencia.
Conexión de la fuente de alimentación
Conectar la fuente de alimentación a una prensa plegadora hidráulica recién adquirida es un paso importante para garantizar su correcto funcionamiento y uso. A continuación, se muestra un procedimiento sencillo para conectar correctamente la fuente de alimentación a una prensa plegadora hidráulica:

1. Confirme los requisitos de energía: Antes de conectar la fuente de alimentación, confirme los requisitos de potencia de la prensa plegadora hidráulica. Consulte las especificaciones de la prensa plegadora, el manual del usuario o la información proporcionada por el personal de servicio para comprender el voltaje, la fase y la frecuencia necesarios para su funcionamiento.
2. Prepare el cable de alimentación: Según los requisitos de potencia de la prensa plegadora hidráulica, seleccione un cable de alimentación adecuado. Asegúrese de que la corriente y el voltaje nominales del cable coincidan con los requisitos del equipo. Si es necesario, adquiera un cable de alimentación que cumpla con las normas.
3. Compruebe la toma de corriente: Compruebe que la toma de corriente utilizada para la conexión eléctrica cumpla con los requisitos de la prensa plegadora hidráulica. Asegúrese de que el voltaje, la fase y la frecuencia de la toma coincidan con los requisitos del equipo. Además, asegúrese de que la toma de corriente tenga una conexión a tierra fiable para garantizar una conexión eléctrica segura.
4. Conecte el cable de alimentación: Conecte el cable de alimentación seleccionado a la toma de corriente en el orden correcto. Asegúrese de que el extremo del cable esté completamente conectado a la toma y de que el enchufe esté bien insertado.
5. Inspeccione la conexión eléctrica: Una vez conectado el cable de alimentación a la toma de corriente, inspeccione cuidadosamente la conexión. Asegúrese de que el cable no presente daños ni esté suelto. Verifique que esté correctamente conectado a la entrada de alimentación de la prensa plegadora hidráulica.
6. Prueba de encendido: Después de conectar la fuente de alimentación, realice una prueba de encendido para verificar si el motor principal de la prensa plegadora hidráulica funciona correctamente (este paso se puede omitir si ha comprado una prensa plegadora con un sistema de alimentación servohíbrido).
6.1. Encienda la fuente de alimentación principal del gabinete de distribución de energía: Antes de encender la máquina, cierre la puerta del armario de distribución de energía de la prensa plegadora hidráulica y gire la manija del armario eléctrico en sentido horario para bloquearlo. En este momento, también se activará la alimentación del armario eléctrico principal.


6.2. Encienda la fuente de alimentación de control: Inserte la llave de control de encendido y gírela hacia la derecha. En ese momento, se encenderá el control de encendido y se iluminará el indicador de control de encendido.


6.3. Compruebe todos los botones de parada de emergencia: Verifique los botones de parada de emergencia en el gabinete eléctrico, el controlador y el interruptor de pedal, y vuelva a colocarlos en estado abierto.


6.4. Arranque la bomba de aceite: Presione el botón de inicio de la bomba de aceite, la luz indicadora verde en el botón se enciende, en este momento la bomba de aceite principal de la prensa plegadora hidráulica se enciende y comienza a funcionar:


- Si las aspas del ventilador del motor principal giran en el sentido de las agujas del reloj, indica que la secuencia de fases de alimentación está conectada correctamente y puede continuar con los siguientes pasos.
- Si las aspas del ventilador del motor principal giran en sentido antihorario, indica que la secuencia de fases de alimentación está conectada incorrectamente y es necesario intercambiar dos fases cualesquiera de la línea de alimentación trifásica en el enchufe.
Luego de confirmar la secuencia de fases de energía, observe la pantalla o las luces indicadoras del equipo para asegurarse de que arranca y funciona normalmente.


Tenga en cuenta que el proceso anterior es una guía básica. Para garantizar una conexión correcta a la fuente de alimentación y evitar posibles riesgos, consulte siempre la prensa plegadora‘Lea el manual del usuario y siga las instrucciones del personal de servicio. Si no está seguro o no tiene experiencia con este proceso, le recomendamos buscar la ayuda de electricistas profesionales para completar la conexión eléctrica.
Estos son los preparativos necesarios antes de poner en marcha una prensa plegadora. Esperamos que esta información le haya sido útil. Si ha completado estos pasos, puede continuar leyendo nuestro siguiente artículo:


